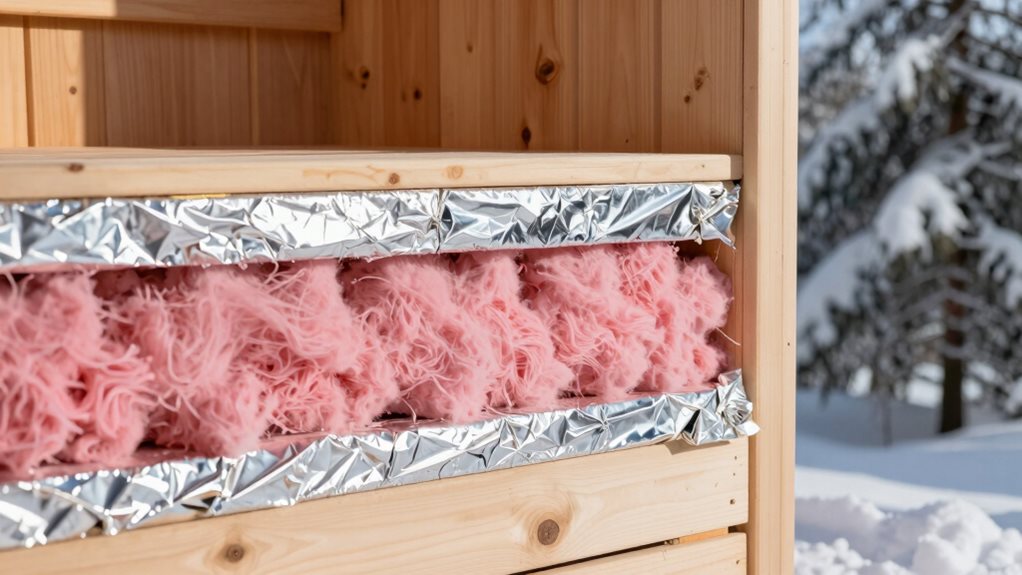

For ideal outdoor sauna performance, use mineral wool insulation as it offers superior R-values (22-37% higher than fiberglass) and withstands temperatures up to 2,000°F. Install a proper aluminum foil vapor barrier on the warm side, sealing all seams with heat-resistant tape. Insulate ceilings more heavily than walls (6-8 inches vs. 4-5 inches in cold climates), and don’t forget floor insulation with multiple layers. These techniques will maximize heat retention while preventing moisture damage and extending your sauna’s lifespan.
Understanding R-Values for Outdoor Sauna Performance
When building an outdoor sauna, understanding R-values becomes your foundation for creating a truly efficient heat sanctuary. R-values measure how well insulation resists heat flow—the higher the number, the better it keeps your sauna’s warmth inside.
For outdoor saunas exposed to the elements, you’ll need at least R-19 in your walls, while ceilings require R-26 to R-30 since heat naturally rises.
Materials matter greatly in your insulation strategy. PIR boards offer the best performance at R-6.5 per inch, while standard fiberglass provides R-3.2 to R-3.8 per inch.
Remember that sauna temperatures create a much higher temperature difference (up to 200°F) than standard R-value testing conditions, which can affect real-world performance.
Adding reflective foil-faced materials improves effectiveness, preventing cold spots and making sure your sauna heats evenly. Proper installation requires sealing all seams with high-temperature aluminum tape to ensure moisture doesn’t compromise your insulation’s performance. Installing a continuous vapor barrier on the warm side of walls is essential for optimal effectiveness and long-term protection against moisture damage.
Mineral Wool vs. Fiberglass: Choosing the Right Material
The choice between mineral wool and fiberglass insulation represents one of the most critical decisions you’ll make for your outdoor sauna project.
For saunas, where heat retention and fire safety are paramount, mineral wool’s superior properties often justify its higher cost.
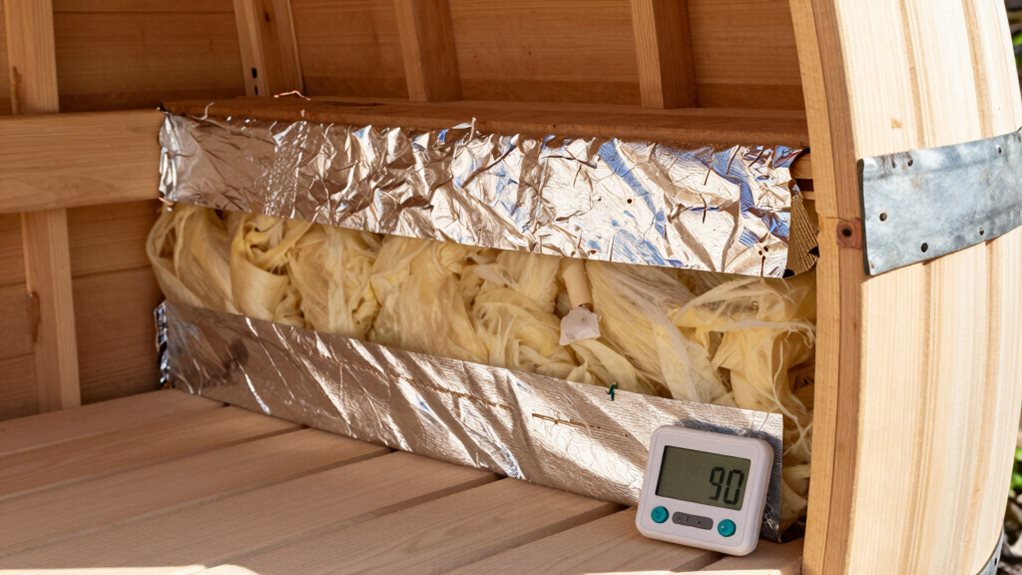
Mineral wool delivers 22-37% higher R-value per inch than fiberglass, meaning better temperature regulation and potentially lower heating costs.
Its ability to withstand temperatures up to 2,000°F (compared to fiberglass’s 1,200°F) provides crucial safety in high-heat environments.
You’ll appreciate mineral wool’s natural moisture resistance in your sauna’s humid conditions, preventing mold growth without additional vapor barriers.
While installation may be more challenging due to its density and rigidity, the superior soundproofing (with NRC ratings of 0.95-1.05) creates a more peaceful sauna experience.
The Critical Role of Vapor Barriers in Humidity Management
Beyond selecting the proper insulation material, you’ll need to address moisture control in your outdoor sauna.
Vapor barriers prevent condensation that leads to mold and structural damage while keeping your insulation effective over time.
- Install your vapor barrier on the warm side (inside) of the wall, overlapping seams by 12 inches and sealing with appropriate tape.
- Choose aluminum foil barriers rather than bubble wrap types that can melt at high temperatures.
- Start installation with the ceiling first, then walls, allowing the wall barrier to overlap the ceiling by 3 inches.
- Skip floor installation, but create an air gap between the barrier and wood cladding for best performance.
This strategic approach to moisture management significantly enhances your sauna’s thermal resistance and overall energy efficiency.
Regular inspection for tears or gaps guarantees your vapor barrier continues protecting your sauna investment for years to come.
While some enthusiasts debate breathing walls, a properly sealed hot room will maintain both optimal heat and humidity levels for an authentic sauna experience.
Ceiling and Wall Insulation Techniques for Maximum Heat Retention
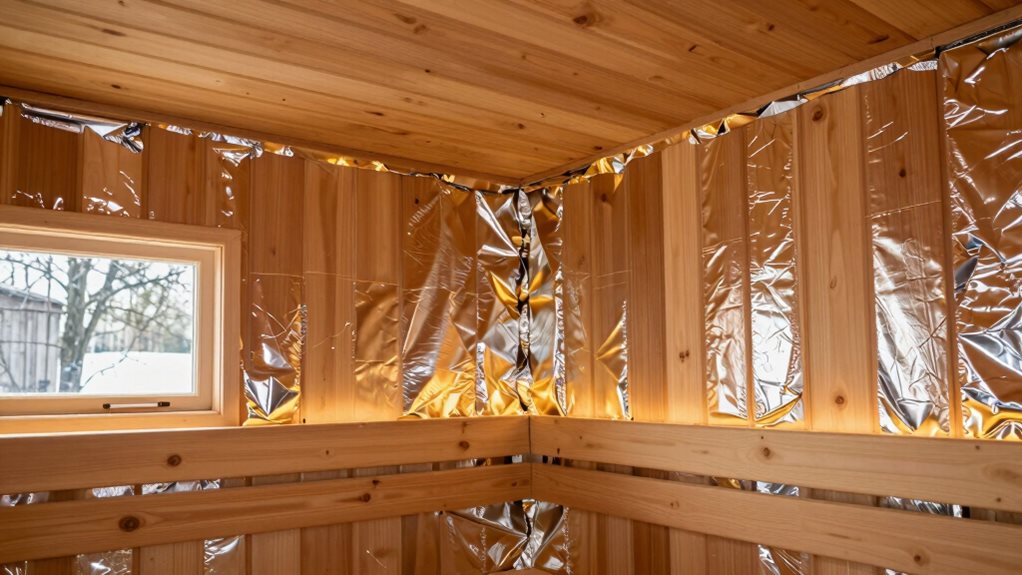
You’ll need to layer mineral wool densely in your sauna’s ceiling, where heat naturally rises, applying at least 40% more thickness than in your walls.
For maximum heat retention, install foil barriers with the shiny side facing inward, sealing all seams with heat-resistant aluminum tape to create an unbroken reflective shield.
In colder climates, increase your insulation thickness to 6-8 inches in ceilings and 4-5 inches in walls, which prevents heat loss and reduces the time needed to reach ideal sauna temperatures.
This comprehensive approach can extend the lifespan of your sauna structure by protecting it from temperature fluctuations and moisture damage.
While fiberglass insulation is more affordable, consider mineral wool as it offers superior moisture resistance and better prevents mold growth in high-humidity sauna environments.
Layering Mineral Wool Effectively
When installing mineral wool in outdoor saunas, proper layering techniques make all the difference between a sauna that retains heat efficiently and one that leaks warmth into the surrounding environment.
The key is creating a continuous thermal barrier without gaps where heat can escape.
Here’s how to effectively layer mineral wool in your sauna:
- Start with a minimum 3-inch thickness for interior walls, increasing to 4 inches for exterior-facing walls.
- Install batts snugly between studs without compressing them, which would reduce their insulating value.
- Apply thicker layers on the ceiling where heat naturally rises and can escape.
- Create an airtight seal by taping all seams on foil-faced mineral wool before finishing walls.
You’ll appreciate mineral wool’s superior R-value of 3.0-3.3 per inch compared to fiberglass, especially during cold weather.
The hydrophobic properties of mineral wool make it an excellent choice for outdoor saunas where moisture resistance is crucial for long-term performance.
The wall assembly should include an aluminum foil radiant barrier with proper air gaps to enhance insulation performance while preventing moisture from becoming trapped inside the structure.
Foil Barrier Installation Tips
A properly installed foil barrier forms the critical reflective layer in your sauna’s insulation system, bouncing heat back toward the interior while preventing moisture migration through walls and ceiling.
Install the reinforced aluminum foil on the warmer, inner side of your sauna construction, positioning it behind wood paneling but away from direct stove heat.
When installing, measure your walls carefully and cut the 54-inch wide foil using a utility knife.
You’ll want to staple the barrier over wall studs, using 3/8-inch staples and minimizing penetrations. For maximum effectiveness, overlap seams by at least 6 inches and seal them with quality foil tape.
Don’t forget to cover both walls and ceiling before adding your tongue-and-groove paneling.
Confirm you’ve created a continuous moisture barrier with no gaps, especially at corners where walls meet. Before applying the aluminum foil, ensure all building components are completely dry and cured to prevent trapping unwanted moisture within your sauna structure.
Cold-Weather Thickness Requirements
Harsh winter conditions demand considerably thicker insulation for outdoor saunas to maintain that perfect steamy environment while the snow piles up outside.
Your sauna needs more insulation in ceilings than walls because heat rises, with R-26 to R-30 ratings recommended for ideal retention.
For cold climates, follow these thickness guidelines:
- Install 6-8 inches of mineral wool in ceilings (R-26 to R-30)
- Use at least 6 inches (R-21) of insulation in exterior-facing walls
- Add foil-faced foam board to both surfaces for improved efficiency
- Include a minimum R-13 to R-19 rating for walls, higher in severe winter areas
Remember to tape all seams tightly after installation.
These thicker layers prevent condensation by keeping interior surfaces above the dew point while greatly reducing heating time and providing a complete moisture barrier protection against structural damage that commonly occurs in winter environments.
Floor Insulation Solutions to Prevent Heat Loss
You’ll need to create a proper thermal barrier in your sauna floor to prevent valuable heat from escaping into the ground below.
Consider installing multiple layers, including rigid foam boards between floor joists, which provide excellent R-value while maintaining structural integrity.
Don’t forget to incorporate a vapor barrier on the warm side of your insulation, sealed with aluminum tape, to protect against moisture damage that can compromise your floor’s insulating properties.
Multi-Layer Thermal Barriers
Effective floor insulation creates the foundation for your sauna’s thermal performance, combining multiple layers to trap heat where you need it most.
When properly constructed, your floor assembly prevents heat from escaping downward and moisture from creeping upward.
- Install mineral wool between floor joists, leaving a 1-2 inch air gap beneath floorboards to allow drying and achieve R-values of 3.0-3.5 per inch.
- Cover with foil-faced barrier (reflective side up) to bounce radiant heat back into your sauna.
- Seal all seams with heat-resistant aluminum tape, creating a continuous vapor barrier that blocks moisture migration.
- Construct your finished floor with a slight slope toward a drain, using wooden slats on sleepers that allow air circulation and water drainage.
This multi-layer approach optimizes warmup speed and heat retention while preventing mold issues.
Rigid Foam Applications
When seeking ideal thermal performance for your sauna floor, rigid foam insulation offers exceptional heat retention properties that greatly reduce energy loss through the ground.
Two-inch rigid foam panels deliver R-10 insulation value, considered adequate for most sauna applications.
For installation between joists, you’ll want to rip foam sheets to fit flush, resting them on 1×2 or 2×2 strips screwed 2 inches down from the top.
Seal all edges with Great Stuff foam and foil tape to prevent heat escape. This method works well with both wood and concrete floors.
Don’t forget to protect against rodents by adding hardware cloth or fine screen beneath the foam.
With proper installation, you’ll reduce floor heat loss by up to 50%, keeping your feet comfortable and your sauna efficient.
Moisture Prevention Techniques
While rigid foam provides excellent thermal barriers for sauna floors, moisture management remains equally important for long-term durability.
Combining insulation with proper moisture control prevents mold, rot, and structural damage that could compromise your sauna’s performance and safety.
- Install mineral wool as a partial fill, leaving a 1-2 inch gap beneath floorboards to allow for ventilation and moisture evaporation.
- Create a sloped drainage system with a trough drain or shower pan-like structure to direct water away from wooden elements.
- Apply a properly sealed aluminum foil vapor barrier to reflect heat back into the sauna while blocking moisture penetration.
- Maintain an air gap between your vapor barrier and cladding using 1×4 spacers, which creates a dry zone that extends the life of your sauna floor.
Weather-Resistant Strategies for Extreme Conditions
Building a sauna that can withstand nature’s harshest challenges requires strategic weather-resistant design choices.
You’ll need a continuous rain screen with ventilated air gap behind your cladding to prevent wind-driven moisture while allowing walls to dry. For extreme cold, install a robust interior vapor retarder on the warm side of your insulation, with all seams carefully taped to prevent moisture migration during freeze-thaw cycles.
Choose mineral wool batts for wall cavities due to their moisture resilience and dimensional stability in cold conditions.
For exterior applications, closed-cell rigid foam provides excellent air-sealing and reduced moisture absorption.
Don’t forget to raise and slope your sauna floor to shed water, and use high-quality exterior sealants rated for freeze-thaw cycles around all penetrations.
This thorough approach will protect your sauna through winter storms and summer downpours alike.
Energy Efficiency Through Proper Insulation Thickness
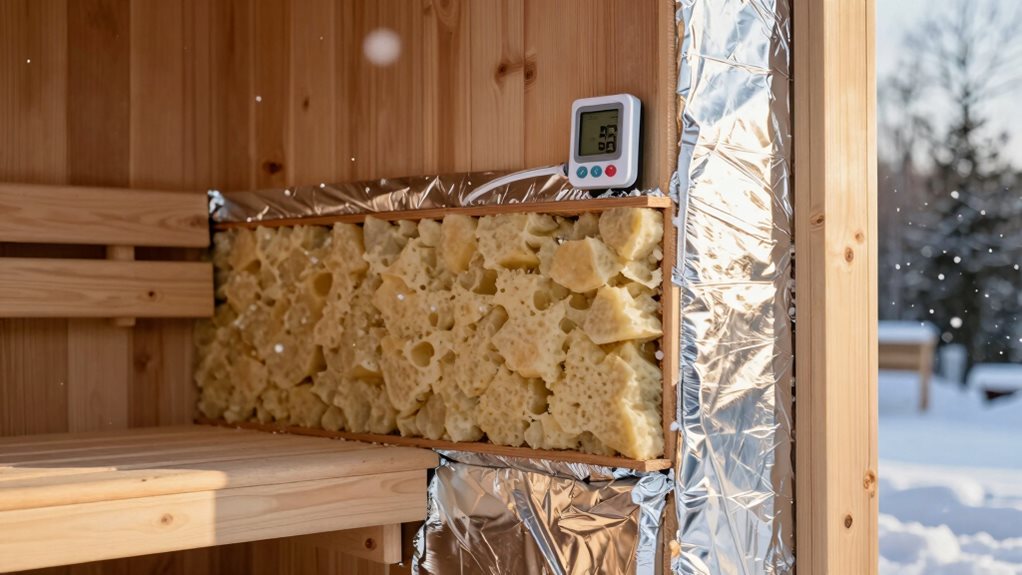
Selecting the proper insulation thickness for your outdoor sauna isn’t just about comfort—it’s vital for energy efficiency and sustainable operation. When you choose the right thickness, you’ll heat your sauna faster and maintain temperature with less energy.
Proper insulation isn’t optional—it’s essential for creating an energy-efficient sauna that heats quickly and retains warmth effectively.
- Wall insulation requires R-13 to R-19 values, achievable with 2-inch rigid foam or mineral wool batting between 2×4 joists.
- Ceiling insulation needs higher R-values (R-22 to R-30), typically using 7¼-inch thick rockwool batts between 2×6 joists.
- Material matters – mineral wool needs 4 inches (6 inches in colder climates), while closed-cell foam requires at least 2 inches.
- Climate considerations are vital – what works in mild regions won’t suffice in extreme cold, where 6-inch mineral wool becomes necessary.
Frequently Asked Questions
How Long Will Proper Insulation Extend My Sauna Heater’s Lifespan?
Proper insulation can extend your heater’s lifespan by 20-30% through reduced cycling, lower run-hours, and protection from moisture and thermal stress that commonly cause premature failures.
Can I Use Spray Foam Insulation in My Outdoor Sauna?
No, don’t use spray foam in your sauna. Despite good R-values, it degrades at high temperatures (180-200°F), releases harmful chemicals, and off-gases indefinitely—making it unsafe for sauna environments.
How Do I Insulate Around Electrical Components and Heater Mounting Areas?
Use mineral wool around high-heat areas, seal penetrations with heat-resistant tape, and install foil vapor barriers. Keep wires in rubber conduit and don’t compress insulation near mounting brackets.
Is Additional Insulation Needed for Barrel-Shaped Saunas?
Usually not. Barrel saunas’ curved design naturally minimizes heat loss. You’ll only need additional insulation in extremely cold climates or if you want maximum energy efficiency.
How Often Should Outdoor Sauna Insulation Be Replaced or Maintained?
You should inspect your outdoor sauna insulation biannually and replace fiberglass every 15-20 years. Spray foam can last 80-100 years with proper maintenance and regular checks for moisture damage.
Final Thoughts
You’ll find that proper insulation is the key to your outdoor sauna’s performance and efficiency. By selecting appropriate materials, installing effective vapor barriers, and guaranteeing adequate thickness throughout walls, ceiling, and floor, you’re creating a sanctuary that retains heat even in harsh weather. Remember, your insulation choices directly impact your energy costs and comfort level. With these strategies, you’ll enjoy countless relaxing sessions in your well-insulated outdoor retreat.