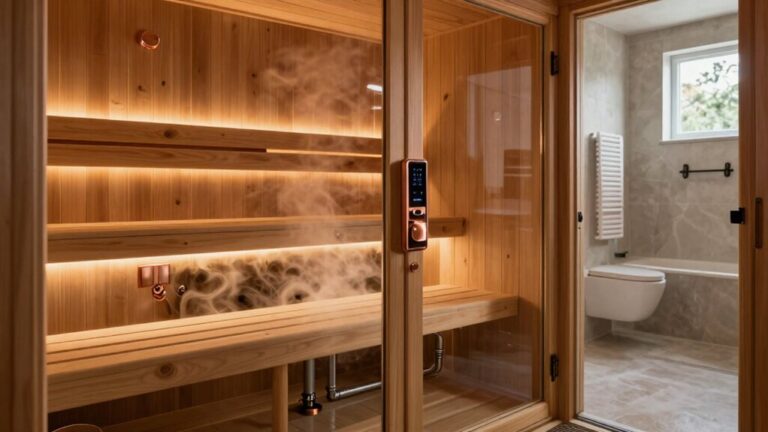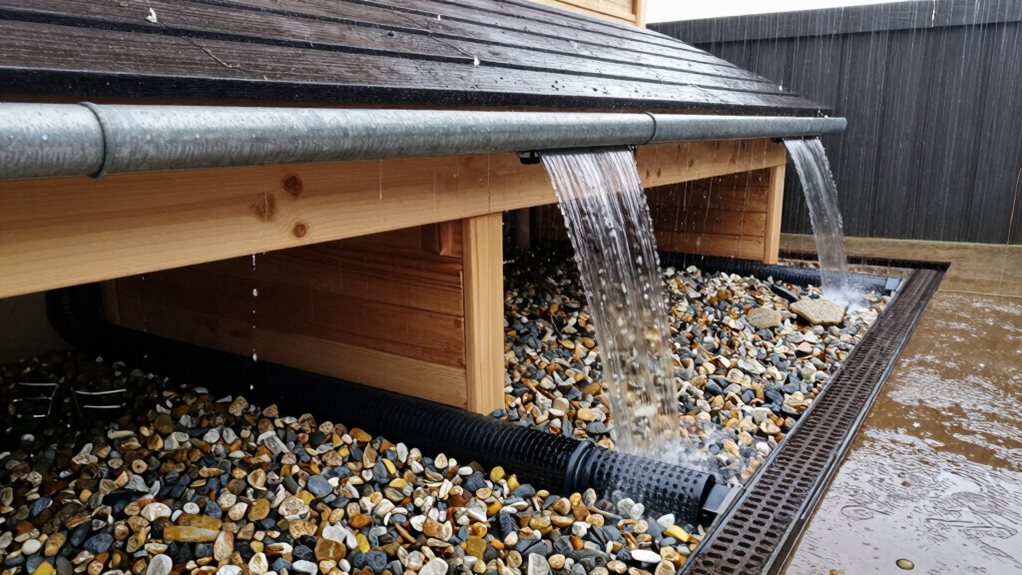

Proper drainage is crucial for your outdoor sauna’s longevity. Start with a site that has natural slope, then build on a raised foundation with crushed stone underneath. Install floor drains with a slight gradient to prevent standing water, and add gutters with generous overhangs to direct rainfall away. Use moisture-resistant materials like cedar and stainless steel components. Regular maintenance of all drainage systems will protect your investment for decades instead of years.
Understanding the Critical Role of Proper Drainage in Sauna Longevity
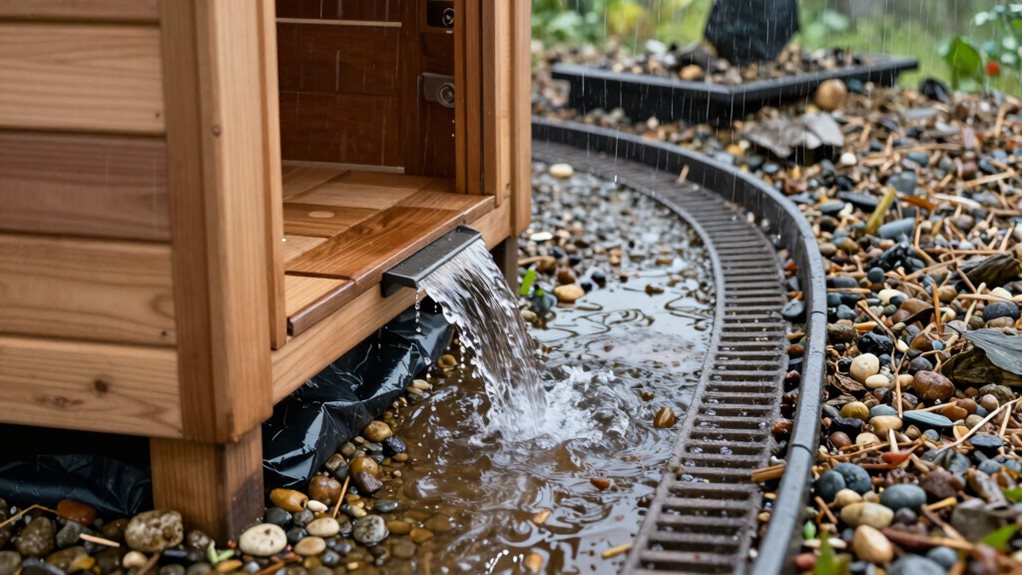
While building an outdoor sauna represents a considerable investment in your wellness routine, neglecting proper drainage can quickly transform your relaxation haven into a maintenance nightmare.
Water accumulation from steam, condensation, and löyly creates ongoing threats to your sauna’s structural integrity, potentially reducing its lifespan from 50 years to merely 15.
Proper moisture management isn’t optional—it’s the difference between decades of enjoyment and premature structural failure.
Without proper drainage, standing water warps wood, promotes mold growth, and accelerates rot in your cedar or pine framing.
Your outdoor sauna faces even greater risks from rain and snowmelt infiltration.
Sloped floors directing water to drains prevent moisture retention, while raised foundations block ground moisture from wicking upward.
When you combine effective drainage with proper ventilation, you’re not only protecting your investment—you’re guaranteeing decades of trouble-free enjoyment and greatly reduced maintenance requirements.
Site Selection and Assessment: Reading Your Land’s Water Patterns
Where you place your outdoor sauna dramatically affects its long-term performance and maintenance needs. By reading your land’s natural water patterns, you’ll prevent costly damage and extend your sauna’s life. Look for high ground with at least a 2% slope, which naturally diverts water away from your structure.
When evaluating your site, pay attention to:
- How water flows across your property during heavy rain
- The types of soil present (sandy soils drain better than clay)
- Existing vegetation that might help or hinder drainage
- Natural high points that stay dry even after storms
Using simple tools like a level or observing where puddles form after rainfall can reveal significant drainage patterns.
Foundation Options That Promote Natural Water Diversion
Your outdoor sauna needs a foundation that naturally directs water away from the structure, preventing moisture damage and extending its lifespan.
Raised base designs, which lift your sauna several inches above ground level, create a barrier between your sauna and potentially damaging ground moisture.
Gravel drainage systems complement raised designs by providing a permeable foundation that allows water to percolate naturally into the soil rather than pooling around your sauna’s base. Outdoor installations offer more flexibility with drainage solutions compared to indoor setups. Incorporating a slight gradient in the foundation design further ensures water flows away from your sauna structure.
Elevated Base Designs
Choosing a raised base design for your outdoor sauna provides vital drainage benefits that protect your investment for years to come.
Raised structures allow water to flow naturally beneath your sauna, preventing moisture damage to both the foundation and structure itself. You’ll find several effective options that work well on various terrains. A proper foundation with adequate drainage ensures stability of your sauna while protecting it from potential water damage.
For ideal drainage and longevity, consider these popular raised base designs:
- Pier foundations with concrete supports and treated timber bearers work perfectly for sloped sites
- Deck systems that raise your sauna 250-350mm using pressure-treated lumber frames
- Wood platforms with sealed, pressure-treated frames that prevent water pooling
- Adjustable supports combined with timber bearers for precise leveling on uneven ground
Each design creates fundamental air circulation beneath your sauna while minimizing ground disruption during installation.
Gravel Drainage Systems
Gravel drainage systems provide a vital foundation for outdoor saunas, effectively channeling water away while creating a stable base for your structure.
Start by excavating 4-6 inches of soil, removing debris, and leveling the site. You’ll want to extend your gravel pad about 2 feet beyond the sauna’s perimeter.
For best results, lay down a geotextile membrane first to prevent weed growth. Then add your Class 5 gravel in layers, compacting each with a tamper. Aim for a total depth of 4-6 inches, keeping the finished bed 2 inches above grade. This slight elevation creates a natural gradient that directs water away from your sauna. Selecting an area with good drainage from the start will significantly enhance your system’s effectiveness.
Don’t use pea gravel—it won’t compact properly. Instead, choose crushed stone that locks together firmly, providing stability while allowing water to percolate naturally.
Floor Drainage Systems: From Simple to Sophisticated Solutions
Your outdoor sauna’s floor drainage system can range from basic gravel beds to sophisticated linear drains, depending on your needs and budget.
You’ll find that self-draining floors, whether using natural gravel filtration or installed drains, prevent water accumulation that could damage wood and create slip hazards.
When installing any drainage solution, consider both the floor’s slope (directing water toward the drain) and proper waterproofing techniques, including silicone seals around drain fixtures and waterproof membranes beneath flooring materials. Regular inspections help identify potential drainage issues before they cause structural damage to your sauna. For wood-burning heaters specifically, a drainage system is absolutely necessary for effective ash cleanup and maintenance.
Self-Draining Floor Designs
When it comes to outdoor saunas, the right drainage system isn’t just a convenience—it’s essential for maintaining your sauna’s longevity and performance. Self-draining floor designs eliminate standing water that can cause mold and structural damage over time.
You’ll find several effective options for creating proper water flow:
- Trevor Trowel method creates a firm, sloped cement board base that directs water to drains
- Sleepers with decreasing widths achieve a natural pitch on your subfloor
- Gravel-filled trenches with perforated pipes allow natural water percolation
- Linear drains positioned at one end require minimal slope for efficient water removal
For outdoor saunas without solid floors, consider using a French drain system with permeable materials like gravel bases. This natural approach directs water away from your foundation while maintaining the rustic appeal of your outdoor sauna space.
Practical Installation Considerations
Before diving into the installation process, a thorough site assessment becomes your foundation for success. Evaluate your sauna location’s topography, soil composition, and water flow patterns using laser levels for precise measurements. This prevents future water pooling issues and helps you select appropriate drainage solutions.
When preparing your foundation, opt for permeable materials like gravel or crushed stone that allow water to percolate through. For non-slab installations, prepare a gravel base or drainage pit directly under the sauna.
Don’t forget to incorporate a slight gradient that directs water away from your structure.
For the actual drain installation, use a hole saw to create 3-4 inch openings, positioning drains in corners for ideal flow. Choose stainless steel components for durability and seal all edges with waterproof silicone to create a moisture-resistant system that will protect your investment for years.
Effective Roof Design and Gutter Systems for Moisture Control
Although outdoor saunas provide relaxation and wellness benefits, their exposure to the elements demands thoughtful moisture management solutions. Your sauna’s roof serves as the first line of defense against water damage. Choose weather-resistant materials like metal panels, which outlast traditional asphalt shingles and better withstand harsh conditions.
Building a durable outdoor sauna requires thoughtful weather protection, starting with a robust, weather-resistant roof system.
To maximize your sauna’s protection, you’ll want to incorporate:
- Generous roof overhangs that shield walls and doors from direct rainfall
- Proper flashing at all seams, using galvanized steel or aluminum that directs water away
- Ventilation systems with air gaps created by strapping to allow moisture to escape
- Gutters that are regularly cleared of debris to prevent water backup and overflow
A sloped roof design helps water run off quickly, preventing the accumulation that can compromise your sauna’s structure. Installing a flashing collar around chimneys with high-temperature silicone sealant creates an essential water barrier at this vulnerable roof penetration point. Placing your sauna in an area with good drainage away from low-lying spots will further protect its foundation from water damage.
Installing French Drains and Perimeter Protection
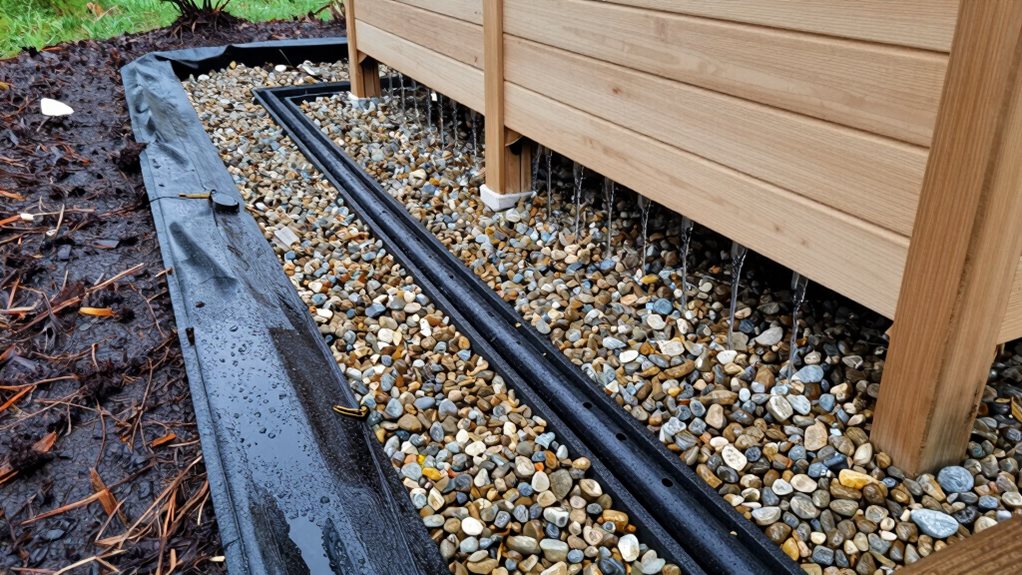
Protecting your outdoor sauna from water damage requires more than just a good roof and gutters, which is why French drains and perimeter protection systems are essential components of any thorough drainage solution.
These systems redirect water away from your sauna’s foundation before it can cause damage.
To install an effective French drain, dig trenches about 10 inches wide and 4 feet deep around your sauna’s perimeter. Add a 3-inch layer of gravel, place 4-inch perforated pipes in the trench, then cover with more gravel.
This creates a filtration system that captures water and channels it away from your building.
Before installation, assess your site’s topography and soil composition. Position multiple drainage points where water naturally collects, and verify trenches have a slight gradient for proper water flow.
Ventilation Strategies That Complement Your Drainage System
Proper ventilation works hand-in-hand with your drainage system to keep your outdoor sauna dry, functional, and free from moisture damage.
When positioning vents, consider how they’ll interact with your drainage setup to maximize moisture removal.
For ideal moisture control, implement these ventilation principles:
- Place exhaust vents low (about 18 inches from floor) to pull moist air downward toward your drainage points
- Install a high drying vent at the ceiling to release trapped moisture after sessions
- Position intake and exhaust on opposite walls to create cross-ventilation that helps dry floor surfaces
- Size your total vent area to at least 1 square inch per cubic foot of sauna volume
Adding a mechanical ventilation system can significantly reduce heat stratification and direct warm air toward floor areas, accelerating evaporation and improving your drainage efficiency.
Regular airflow management prevents excess moisture buildup that could otherwise lead to mold growth and structural deterioration over time.
Remember to seal all duct connections thoroughly to prevent condensation from escaping into walls where it can’t reach your drainage system.
Material Choices for Weather-Resistant Drainage Components
While ventilation manages airborne moisture, your drainage components tackle liquid water—and the materials you choose make all the difference in longevity. Stainless steel drain channels and pipes are your best allies, resisting corrosion even with constant exposure to moisture and temperature swings.
Proper drainage materials prevent water damage—choose stainless steel components to ensure your sauna’s structural integrity for years to come.
For your foundation, a concrete pad at least 4 inches thick creates a stable base, especially when paired with a gravel layer underneath to improve drainage.
Don’t forget to incorporate a proper slope toward your drain—this prevents standing water that can damage your sauna.
When selecting wood near drainage areas, cedar and hemlock excel at maintaining their structure in wet conditions.
For flooring, waterproof tile not only traps excess water for easy drainage but also prevents mold growth, functioning effectively with slot, central, or offset drain configurations.
Seasonal Maintenance Practices to Ensure Drainage Efficiency
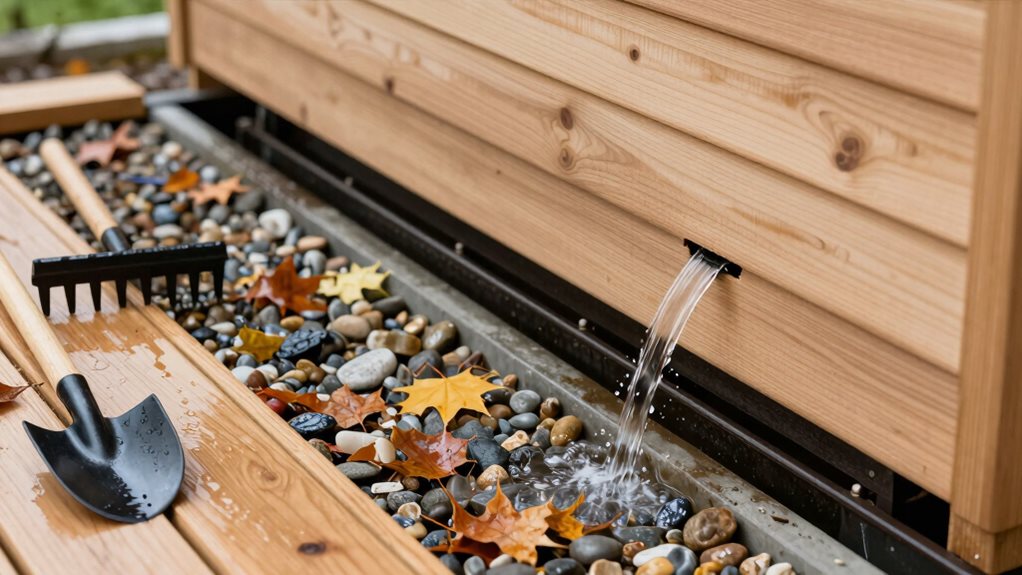
Seasonal changes demand different approaches to sauna drainage maintenance, turning what might seem like a simple task into a vital year-round routine.
You’ll need to adapt your care schedule as weather patterns shift throughout the year.
During spring and summer, check drains more frequently as rainfall and humidity increase.
After autumn storms, clear fallen leaves from exterior drainage paths before they create blockages.
Winter brings its own challenges with freezing temperatures that can damage pipes.
For year-round drainage efficiency:
- Wipe down wet surfaces after each use, regardless of season
- Run your heater at maximum temperature monthly to eliminate moisture
- Clean drains with vinegar solution quarterly
- Inspect exterior drainage paths after extreme weather events
Frequently Asked Questions
How Does Drainage Affect Indoor Air Quality in My Sauna?
Proper drainage prevents excess moisture that can lead to mold growth, CO2 buildup, and stale air. You’ll breathe easier and enjoy better air circulation in your well-drained sauna.
Can I Retrofit Drainage Systems to an Existing Sauna?
Yes, you can retrofit drainage to existing saunas, though difficulty varies based on your current setup. Consider catch pans under removable slats if full plumbing modifications aren’t feasible for your situation.
How Do Different Wood Types Respond to Drainage Issues?
Cedar and thermally modified woods resist moisture damage best when drainage issues occur. You’ll find alder performs well too, while untreated softwoods like pine deteriorate quickly, warping and rotting without proper drainage.
Are Drainage Requirements Different for Electric Versus Wood-Burning Saunas?
Yes, they differ. You’ll need floor drains for both, but wood-burning saunas require additional chimney clearance planning and can produce more intense steam, demanding more robust drainage systems.
What Drainage Modifications Are Needed for Freezing Climates?
In freezing climates, you’ll need heat-traced drainage pipes, steep slope floors, freeze-resistant P-traps, and insulated drain lines. Always install drainage points away from areas prone to ice buildup.
Final Thoughts
You’ve now learned crucial strategies to protect your outdoor sauna from water damage. By carefully selecting your site, implementing proper foundations, installing effective drainage systems, and maintaining them regularly, you’ll greatly extend your sauna’s lifespan. Remember, water is both your sauna’s friend inside and potential enemy outside. With these drainage solutions in place, you can enjoy your outdoor sanctuary for years to come, worry-free.