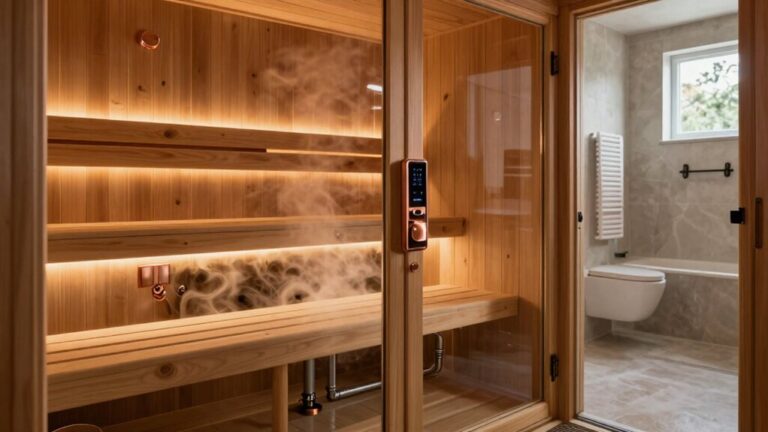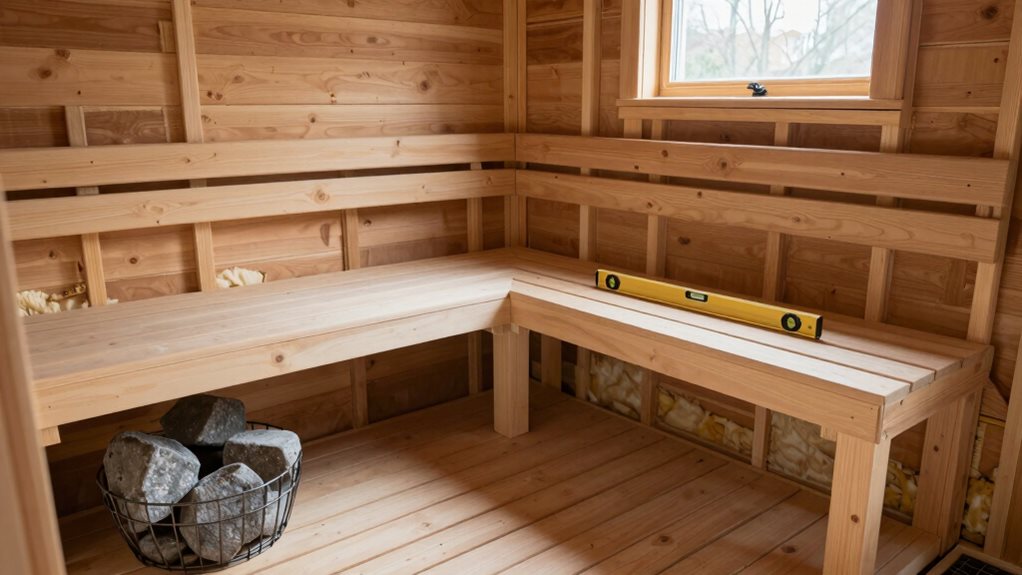

You can build a quality DIY sauna by focusing on key fundamentals: proper sizing (4-6 square feet per person), strategic location (basement, bathroom, or outdoors), sturdy framing with cedar supports, thorough insulation (R-13 to R-19), vapor barriers on the warm side, tongue-and-groove cladding, ergonomic benches at different heights, and balanced ventilation with intake vents low and exhaust vents high. These crucial elements guarantee a safe, efficient, and enjoyable heat therapy experience.
Understanding Sauna Dimensions and Space Requirements
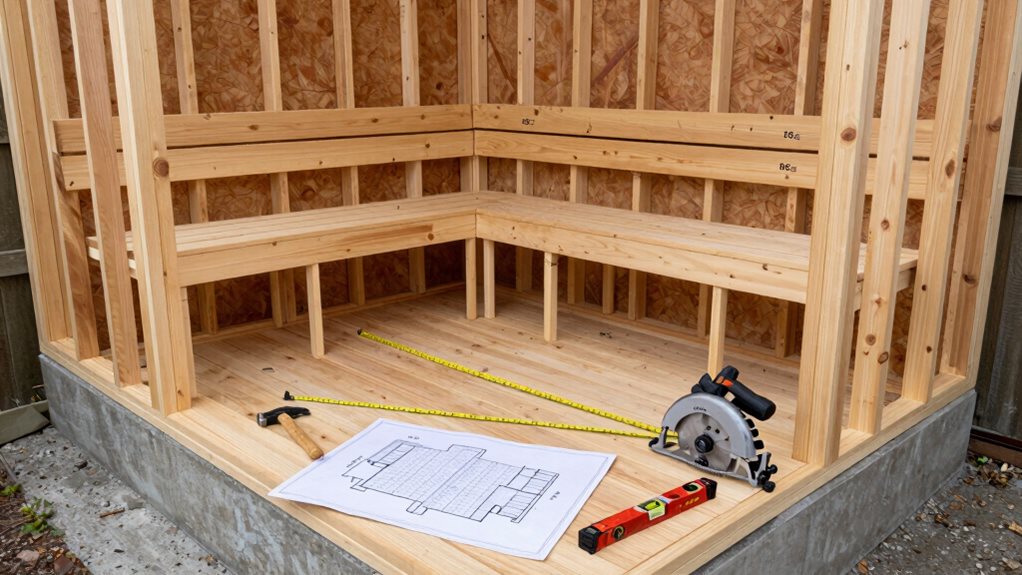
When planning your DIY sauna, understanding the proper dimensions is crucial for creating a comfortable, functional space that meets your needs.
You’ll need to allocate about 4-6 square feet per person for indoor saunas, with each person requiring at least 2 feet of bench space.
For a one-person sauna, you can work with as little as 9 square feet (36″ x 36″), while a two-person setup typically needs 6-10 square feet with an L-shaped bench configuration.
If you’re building for 3-4 people, plan for 20-25 square feet, and larger 5+ person saunas require 36-64 square feet. Outdoor traditional saunas will need more floor space, typically ranging from 16-100 square feet depending on capacity.
A recommended minimum ceiling height of 7 feet ensures optimal comfort and proper heat circulation throughout your sauna.
Selecting the Optimal Location for Your Home Sauna
Choosing the right location for your sauna is perhaps the most vital decision you’ll make during your DIY project. Your site selection affects everything from installation costs to how often you’ll actually use your new wellness space.
Your sauna’s location impacts not just your budget, but ultimately how much wellness benefit you’ll actually enjoy from your investment.
Basements offer excellent utility access and unused space, while bathrooms provide convenient shower access and moisture-resistant finishes. Garages, converted bedrooms, and outdoor areas near pools or patios are also gaining popularity as sauna locations.
Before finalizing your location, consider these critical factors:
- Structural support – Verify your floor can handle the combined weight of the sauna, heater, and occupants, especially for upstairs installations.
- Electrical requirements – Traditional heaters need 240V circuits; proximity to your service panel reduces wiring costs.
- Ventilation options – You’ll need proper air circulation with intake near the heater and an outlet on the opposite wall.
Essential Framing Techniques for Stability and Durability
When building your sauna’s frame, you’ll need to verify your load-bearing walls can support the structure’s weight and heat stresses.
You’ll want to connect your foundation firmly with properly anchored sill plates, using galvanized fasteners that won’t corrode in the high-moisture environment.
Placing your rafters precisely at 16-inch centers will distribute weight evenly across the structure, preventing sagging ceilings and guaranteeing your sauna remains stable for years of relaxing steam sessions.
Using cedar 2×4 lumber for the seal plate provides essential moisture resistance where the walls meet the foundation.
Load-Bearing Wall Construction
Load-bearing wall construction forms the backbone of your sauna project, requiring careful attention to materials and techniques. Your walls must support ceiling joists and roof loads effectively. Use engineered timber or standard 2×4 studs spaced 16 inches on-center for maximum stability. Always verify studs are fully seated in top and bottom tracks with minimal gaps.
For proper load distribution, follow these crucial steps:
- Install double top plates to distribute weight evenly, or use single plates only when loads align directly over studs.
- Secure headers above door and window openings with jack studs (trimmers) to transfer weight to the foundation.
- Add diagonal bracing inside walls until sheathing is attached to keep everything plumb and square.
Securing Foundation Connections
Securing your sauna’s foundation connections forms the critical link between your structure and the ground, guaranteeing long-term stability against seasonal shifts and environmental forces.
You’ll need to choose between concrete slabs (perfect for permanent structures), concrete piers (great for frost protection), or gravel pads (ideal for lighter barrel saunas).
Always use pressure-treated sill plates where wood meets concrete to prevent rot. Fasten these plates using anchor bolts spaced every 4-6 feet, and don’t forget to add a sill gasket to block moisture.
For your floor framing, install hot-dip galvanized or stainless-steel joist hangers and hurricane ties to handle the high-humidity environment. Cross-brace between joists to distribute the weight of benches and heaters evenly.
In coastal areas, stainless-steel fasteners are worth the extra cost to prevent corrosion.
Precise Rafter Placement
Precise rafter placement forms the backbone of your sauna’s structural integrity, creating the framework that will support your roof through years of temperature fluctuations and environmental stresses.
For small sauna roofs, space your rafters 16 inches on center using 2×6 lumber for spans under 12 feet. This spacing provides ideal support for roof cladding and snow loads while allowing proper ventilation.
Before cutting any rafters, follow these crucial layout steps:
- Snap chalk lines on both your ridge beam and wall plates to mark consistent spacing points.
- Create a template for your rafter cuts to guarantee uniform birdsmouth notches and seat positions.
- Install corner rafters first, then use a stringline to align intermediate rafters perfectly plumb and level.
Proper Insulation Methods for Heat Retention
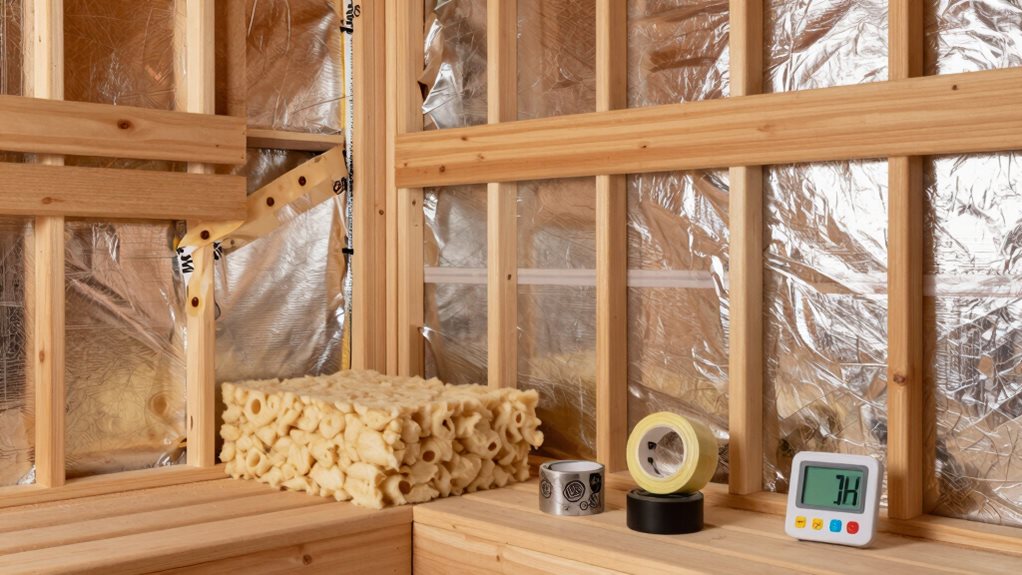
When building your sauna, proper insulation becomes the critical difference between a quickly cooling box and a heat-retaining haven that provides the authentic sauna experience.
For walls, install R-13 to R-19 fiberglass batts or mineral wool between studs, making sure you’ve sealed all gaps with spray foam. Ceilings need higher protection—aim for R-26 to R-30 values since heat naturally rises and escapes upward.
Don’t forget your floors! Lay rigid foam boards beneath your floorboards to prevent downward heat loss.
For maximum efficiency, consider using foil-faced materials on interior surfaces to reflect radiant heat back into the room. Always install a continuous vapor barrier on the warm side of walls to prevent moisture damage to insulation and structural components. When finishing, cover all insulation with heat-resistant cedar panels, creating both protection and aesthetic appeal.
This all-encompassing approach can reduce heat loss by up to 50%, saving energy while delivering the perfect sauna temperature. Different sauna types require varying insulation needs based on their construction style and intended use.
Installing Effective Vapor Barriers and Waterproofing
The effectiveness of your sauna depends greatly on properly installed vapor barriers that protect your investment from moisture damage.
Always use aluminum foil barriers rather than plastic films, as plastic can deteriorate and release harmful gases at high temperatures. Position your vapor barrier on the warm side of the insulation, creating a continuous seal from walls to ceiling.
For proper installation, follow these critical steps:
- Overlap seams by 2-3 inches and seal completely with high-temperature foil tape.
- Carefully seal around all penetrations like light fixtures, vents, and heater pipes.
- Secure the barrier at floor junctions with trim or molding to prevent gaps where moisture could escape.
Remember to inspect your vapor barrier after any mechanical work and immediately reseal any compromised areas to maintain its integrity.
Pure aluminum foil provides 1R insulation efficiency by reflecting radiant heat back into your sauna room while effectively blocking moisture.
Ensure your wood materials are thoroughly dried before installation, as covering damp wood with aluminum foil can trap moisture and cause material damage over time.
Wall and Ceiling Cladding Installation Guide
Properly installing your sauna’s wall and ceiling cladding creates both the signature look and essential functionality of your finished space.
Start with your ceiling, installing tongue-and-groove boards that rest on framing supports. You’ll want to face nail each board’s ends, keeping nails away from edges to prevent splitting.
For walls, you can install boards horizontally (most common) or vertically (better for walls longer than 8 feet). Use blind nailing through the tongue into framing whenever possible, and face nail only the first and last boards. When installing vertically, boards should be butted against the ceiling and face nailed at the top.
Don’t forget to leave a ¼-inch gap between the floor and bottom board for expansion.
Measure frequently to prevent misalignment, and pull joints tightly together as you work. Open multiple packages to blend wood tones evenly across your surfaces.
Building Comfortable and Safe Bench Systems
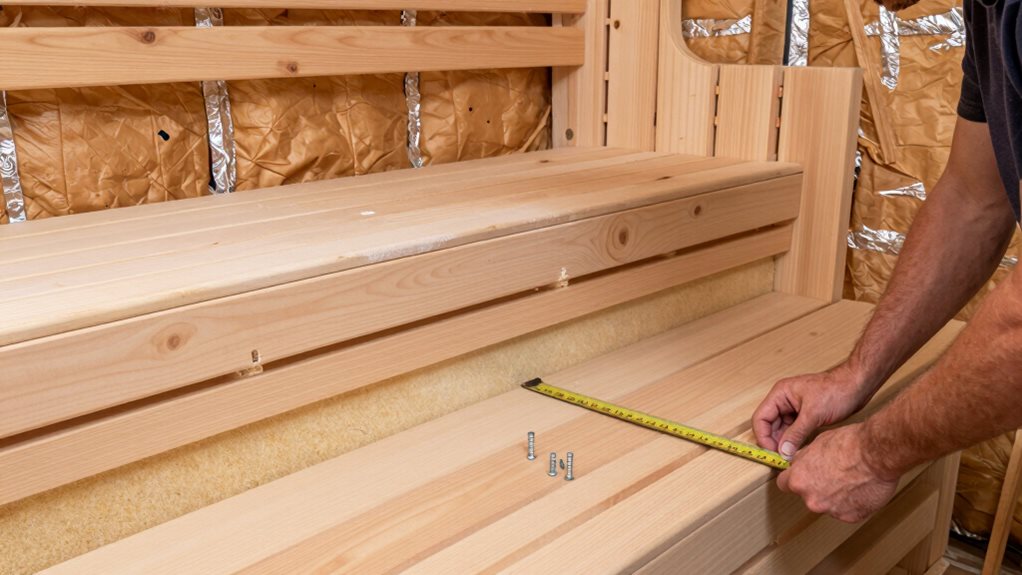
Your sauna’s bench system needs a sturdy support structure that won’t wobble or collapse under heat and weight, with properly secured cleats and crossmembers creating a foundation for comfortable seating.
Consider installing tiered benches at the recommended heights (lower bench at 600mm, upper at 1050mm), which allows bathers to choose their preferred temperature zone while maximizing your sauna’s limited space.
When designing your benches, prioritize ergonomics by guaranteeing proper width (minimum 600mm for upper benches), finely-sanded edges, and adequate gaps between slats for ventilation and comfort during long, relaxing sauna sessions. Choose materials like clear Cedar or Aspen for their smooth, splinter-free surfaces that enhance the overall sauna experience.
Support Structure Fundamentals
Creating a solid foundation for your sauna benches guarantees both comfort and safety during your relaxing steam sessions.
You’ll need to choose between wall-mounted supports using pressure-treated 2x4s secured to studs, or freestanding options that allow better air circulation while maintaining stability.
For a successful support structure, focus on these key elements:
- Secure attachment points – Pre-drill holes and use 3-inch screws, two per stud, confirming connections to wall blocking or base plates.
- Proper framing – Build rectangular frames with cross braces every 16-18 inches for maximum rigidity.
- Hidden fasteners – Attach top boards from underneath using stainless steel screws to prevent burns.
Remember to check for squareness by measuring diagonally across your frame before final assembly, and always leave 1/4 inch clearance for wood expansion.
Tiered Bench Configurations
Tiered bench configurations form the heart of any comfortable sauna experience, offering different heat zones while maximizing the limited space inside your steam room.
For a standard two-tier setup, place your lower bench 16-18″ above the floor and the upper bench 32-40″ high, creating distinct temperature layers and comfortable footrest positions.
When planning your layout, consider an I-shaped design for smaller spaces, L-shaped for moderate rooms, or U-shaped for larger saunas with maximum seating.
Choose materials like aspen, alder, or clear cedar that won’t get too hot or splinter. Space your bench slats about 3/16″-5/8″ apart for good air circulation and drainage.
Remember that temperatures can differ by 36-45°F between tiers, so always maintain proper clearances from your heater according to manufacturer specifications.
Ergonomic Design Considerations
While the sauna’s thermal experience captivates most enthusiasts, proper ergonomic design of your bench system will determine whether your sauna sessions are blissful retreats or uncomfortable ordeals.
You’ll want to create benches that support natural body positions and promote proper heat exposure.
When designing your ergonomic sauna benches, focus on:
- Height proportions – Position your lower bench at 18 inches from the floor, with upper benches 18-24 inches apart vertically, keeping the top bench 40-47 inches below the ceiling for ideal heat immersion.
- Comfortable depths – Build sitting benches at least 20 inches deep and reclining benches 24-28 inches deep.
- Supportive angles – Install backrests at a 15-degree angle with even, rounded edges that follow natural body contours.
Ventilation Strategies for Balanced Air Flow
Proper ventilation stands at the core of any successful sauna experience, assuring both comfort and safety during your steam sessions.
You’ll need two key vents: an intake positioned low (4-12 inches above floor) near your heater, and an exhaust placed high (6-12 inches below ceiling) on the opposite wall.
Size your intake vent at 50-100 cm² and exhaust slightly larger at 75-150 cm². This creates natural convection where cool air enters low, warms up, then exits high—no fans needed for most home saunas!
For proper circulation, verify there’s a 100mm gap beneath your sauna door.
Watch for signs of poor ventilation: temperature differences, stale air, or excess condensation. Aim for 5-8 complete air changes per hour to maintain that perfect löyly feeling.
Frequently Asked Questions
How Does Electrical Wiring Differ Between Wet and Dry Saunas?
Wet saunas need GFCI protection, waterproof wiring, and conduits due to moisture hazards, while dry saunas require simpler 240V wiring without specialized weatherproofing unless installed outdoors. You’ll install no outlets inside either type.
Can I Convert an Existing Closet or Bathroom Into a Sauna?
Yes, you can convert closets or bathrooms into saunas. Measure the space first, install proper insulation, vapor barriers, and cedar paneling. Bathrooms offer plumbing advantages for wet saunas.
What Maintenance Schedule Should I Follow for Optimal Sauna Longevity?
You’ll need daily wipe-downs, weekly cleaning, monthly inspections, and annual maintenance. Clean benches after each use, inspect rocks monthly, and sand/reseal wood yearly for maximum sauna lifespan.
How Do I Safely Incorporate Audio or Lighting Systems?
Install IP65-rated marine speakers in ventilated housings away from heat. Mount wiring in heat-resistant conduit. Keep amplifiers and controls outside the sauna. Use low-voltage lighting with external transformers for safety.
What Wood Treatments Are Safe for Sauna Interiors?
You’ll want to use food-grade paraffin oil or leave wood untreated. Cedar and hemlock naturally resist decay without treatment. Avoid all paints, sealers, polyurethanes, and pressure-treated lumber in your sauna interior.
Final Thoughts
You’ve now mastered the fundamentals of DIY sauna construction! From planning dimensions to creating proper airflow, you’re equipped to build a safe, relaxing retreat. Remember, careful attention to framing, insulation, and waterproofing will guarantee your sauna lasts for years. Take your time with each step, prioritize safety, and soon you’ll be enjoying the warmth and wellness benefits of your very own handcrafted sauna.