
For cold-climate saunas, you’ll need to boost your heater’s power by 25-30% beyond standard calculations. Start by measuring your sauna’s cubic footage (length × width × height), then divide by 35-50 to determine baseline kW needed. Improve efficiency with proper insulation, thicker walls (58-70mm), and minimizing glass. A changing room vestibule and rounded designs retain heat better. The right foundation and ventilation system will transform your winter sauna experience from frustrating to fantastic.
Understanding Cold-Climate Sauna Engineering Fundamentals
When building a sauna for cold climates, understanding the fundamental engineering principles becomes crucial to create a space that’s both efficient and enjoyable.
Your sauna needs thicker walls—at least 44mm, but preferably 58-70mm for severe cold—to combat temperature differentials.
Heat naturally rises while cold air sinks, creating temperature stratification that affects your sauna’s design. You’ll need proper ventilation with both high and low vents to maintain a seamless convective loop. This not only guarantees fresh air but prevents light-headedness during use.
Consider adding a changing room or vestibule to act as an air-lock, retaining precious heat. For permanent installations in freeze-thaw zones, concrete slabs provide stability.
Remember that rounded shapes like barrel saunas retain heat better, and smaller, compact designs heat faster with less energy.
Calculating Precise Cubic Footage for Northern Installations
Three crucial measurements—length, width, and height—form the foundation of proper sauna heater sizing for cold climate installations.
Length, width, and height—these three vital measurements determine proper sauna heater sizing for cold climate installations.
When tackling a northern sauna project, accuracy matters considerably more than in temperate regions. You’ll need to measure your space carefully, rounding to the nearest foot for practical purposes.
To properly calculate your sauna’s cubic footage:
- Measure the interior length from wall to wall in feet, excluding any bench depth.
- Find the width from side to side, keeping your tape level and straight.
- Determine the height from floor to ceiling, accounting for any sloped rooflines.
Once you’ve multiplied these three dimensions together, you’ll have your basic cubic footage—the vital starting point before applying northern climate adjustments for proper heater sizing.
The Cold Climate Multiplier: Adjusting Power Requirements
When you’re building a sauna in a cold climate, you’ll need to apply a power multiplier to guarantee your heater can overcome the chilly conditions.
For uninsulated outdoor saunas, you should increase your calculated power requirements by 25-30% above the standard 1 kW per 50 cubic feet baseline.
This adjustment factor varies by region, with northern installations requiring the full 30% boost, while more temperate zones might need just 15-20% extra capacity. Consulting with a licensed electrician will ensure your sauna’s electrical system is properly sized for safety and optimal heating performance.
Cold Zone Multiplier Fundamentals
Properly adjusting your sauna heater’s power requirements for cold zones can make the difference between a satisfying sauna experience and a disappointing one.
The cold zone—that lower third of your sauna’s volume—creates temperature stratification that must be accounted for when sizing your heater. Cold surfaces like glass and stone leak heat, requiring specific multipliers to guarantee adequate power.
When calculating your sauna’s heating needs, remember these critical adjustments:
- Multiply cold surface area (in square feet) by 5 for a safe power adjustment.
- For glass specifically, increase your cubic footage by 1.5× for single-pane or 1.2× for double-pane.
- Add 1 kW of power for every 5 square feet of glass in your sauna.
These multipliers guarantee your heater can overcome temperature stratification and maintain comfortable heat throughout your sauna, even during the coldest winters.
Calculating Extra Power Needs
Living in cold climates demands substantial adjustments to your sauna heater’s power requirements.
When temperatures drop below freezing, you’ll need to add 25-30% more power to your baseline calculation to maintain proper heat.
Start with the standard formula: measure your sauna’s length, width, and height to get cubic footage, then divide by 35-50 to determine baseline kilowatts.
For a 210 cubic foot sauna, you’d need 4-6 kW under normal conditions.
For winter use, multiply this figure by 1.25-1.3 to compensate for heat loss.
A medium-sized sauna needing 6 kW would require 7.8 kW in cold conditions.
Well-insulated saunas need less adjustment, while poorly insulated ones might need even more than the 30% increase.
Region-Specific Adjustment Factors
Different regions experience vastly different winter temperatures, requiring specific adjustments to your sauna heater’s power capacity.
If you’re in a cold climate, you’ll need to increase your heater size by 25-30% for outdoor or uninsulated saunas, plus another 10-15% if your outdoor setup includes glass features.
For ideal performance in frigid environments, consider these regional multipliers:
- Northern locations: Add 15-20% power to compensate for external temperature fluctuations.
- Mountain areas: Increase capacity by 10-20% to offset both cold and humidity challenges.
- Coastal cold regions: Factor in an additional 10-15% to counter combined cold and wind effects.
Indoor saunas require less adjustment than outdoor ones, as they benefit from your home’s climate control. Proper sizing ensures energy efficiency and consistent performance throughout the winter months.
Well-insulated walls (44-70mm thick) can greatly reduce your need for extreme upsizing.
Glass Installations and Thermal Barriers in Sub-Zero Environments
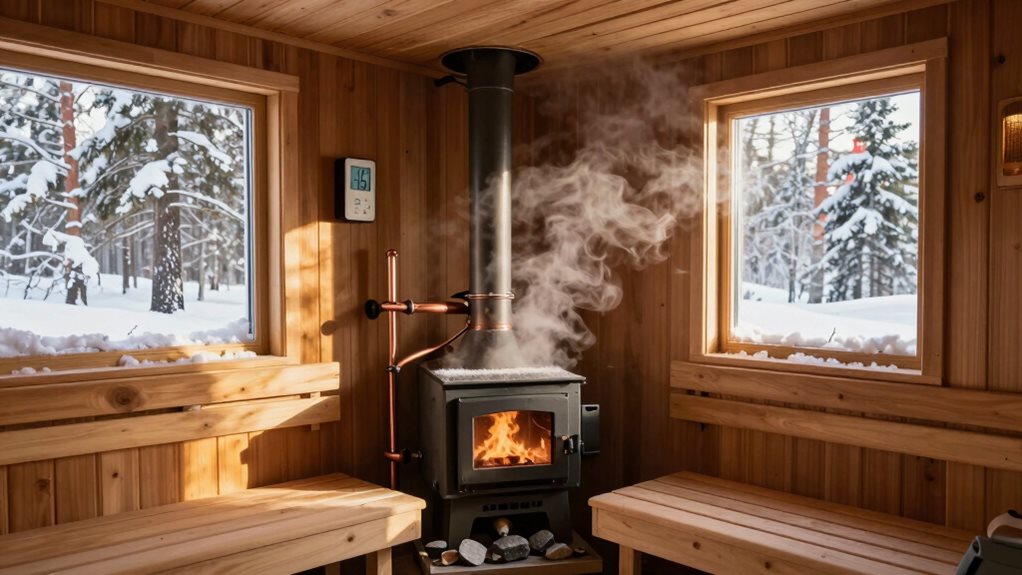
When installing glass in your sauna for sub-zero environments, you’ll need to carefully consider both the thermal properties and installation methods to create an effective barrier against extreme temperature differentials.
Choose frost-resistant tempered glass at 8-10mm thickness, and consider double or triple glazing to reduce your heat loss multiplier from 1.5 to 0.75 per square meter.
Frame your glass with sturdy cedar paneling that matches your hot room, and seal edges with high-quality non-butyle silicone both inside and outside. This creates a watertight barrier crucial for preventing moisture infiltration between panes.
Remember that glass walls require larger heater sizing since they act as heat sinks. For the best performance in harsh winters, allow 30-45 minutes of preheating time and position glass away from the stove to prevent thermal shock.
Insulation Strategies for Extreme Temperature Differentials
Properly insulating your sauna becomes critically important when facing temperature differentials of 100°F or more between the interior and exterior environments.
When building in cold climates, prioritize mineral wool for its superior fire resistance and R-value of 3.0-3.5 per inch, paired with a foil vapor barrier on the interior side.
For maximum efficiency in extreme conditions, follow these critical steps:
- Install thicker ceiling insulation (R-26 to R-30) since heat naturally rises, creating a continuous thermal envelope.
- Seal all vapor barrier seams with high-temperature aluminum tape, overlapping at corners by several inches.
- Use foil-faced polyiso boards (R-6 per inch) for walls where space is limited, making sure the aluminum facers face inward to reflect heat back into your sauna.
Proper installation of these materials can shorten warm-up time significantly while maintaining consistent temperatures throughout your sauna session.
Consider adding a layer of insulation beneath the floor, as proper floor insulation can prevent significant heat loss through conduction, especially with concrete foundations.
Balancing Heat Recovery With User Capacity in Winter Conditions
You’ll need to match your heater capacity to both winter demands and how many people use your sauna in succession.
When multiple users rotate through a sauna during cold months, recovery time between sessions becomes critical as the heater works harder to maintain therapeutic temperatures.
Your heater sizing must account for this increased thermal load, guaranteeing everyone gets the full health benefits without uncomfortable temperature drops that can compromise both the experience and physiological responses.
Heat Retention Technologies
Balancing heat recovery with user capacity becomes a critical consideration during frigid winter conditions. Your sauna’s ability to maintain temperature while accommodating users depends on implementing effective heat retention technologies.
By selecting the right materials and design elements, you’ll create a winter-ready sauna that performs efficiently even in sub-zero temperatures.
- Insulation Strategy – Layer closed-cell spray foam or polyiso insulation in walls and ceilings, creating a thermal envelope that traps heat while blocking moisture migration. Proper insulation prevents cold air infiltration that would otherwise lead to condensation when it contacts warm moist air in the sauna environment.
- Wood Selection – Choose cedar or hemlock woods that naturally insulate and resist temperature fluctuations, maintaining comfort even as outdoor temperatures plummet.
- Vapor Barrier Implementation – Install proper barriers behind wall panels to prevent condensation buildup, protecting your structure while maximizing heater efficiency during cold-weather operation.
Recovery Time Planning
Recovery time planning becomes particularly important when winter’s grip tightens around your sauna. After each use, your sauna needs 15-20 minutes to recover its ideal temperature, especially when operating at 150-195°F in traditional models.
For winter athletes seeking relief after skiing or snowboarding, you’ll want to schedule adequate time between sessions. This allows both the sauna to reheat and users to experience the full benefits of heat-then-cool cycles, which improve cardiovascular adaptation.
Remember, your recovery protocols should account for the increased demand during cold months when everyone wants relief from muscle stiffness, joint pain, and poor circulation.
If you’re using an infrared sauna (120-150°F), you’ll benefit from longer possible sessions and potentially shorter recovery times, accommodating more users during those busy winter evenings.
Multiple-User Heat Management
When winter temperatures plummet, managing heat for multiple sauna users becomes a critical balancing act. Your heater must match both room size and user count, with 9kW models supporting 4-6 people in spaces of 8-15m³. Properly sized heaters maintain temperatures between 150-195°F even in sub-zero conditions, while undersized ones simply can’t reach target temperatures.
For effective multi-user sessions in cold weather:
- Choose a Harvia Virta or similar heater with over 100 lbs of stones for consistent heat distribution.
- Allow 30-45 minutes pre-heating time for insulated cabin saunas (45-60 minutes for barrel models).
- Install tiered bench seating so users can select their preferred temperature zone.
Ventilation becomes especially important with multiple users, preventing oxygen depletion while maintaining ideal heat levels.
Material Selection for Thermal Efficiency in Freezing Temperatures
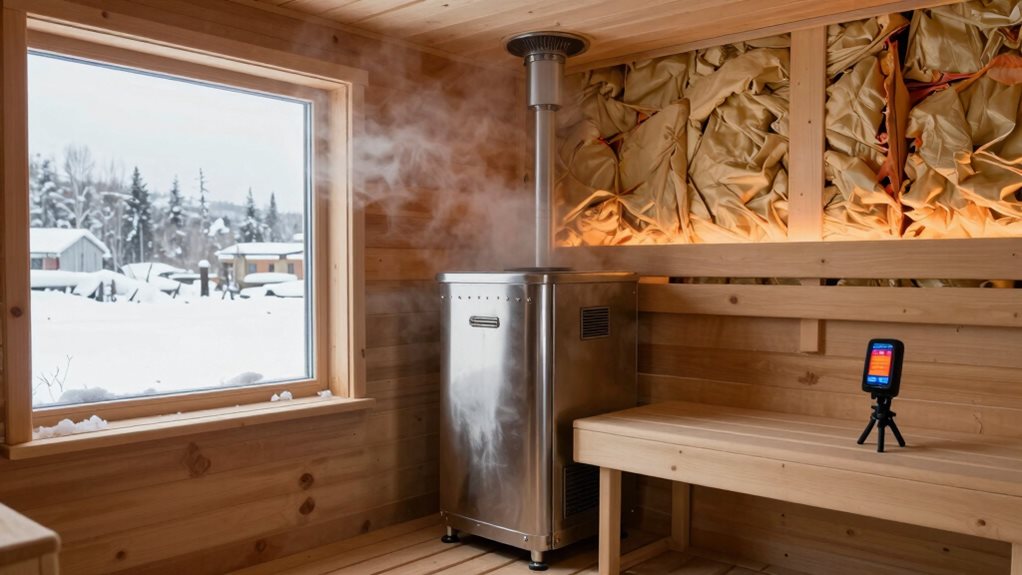
Selecting the right materials for thermal efficiency becomes critical as temperatures plummet below freezing.
You’ll want to prioritize solid wall construction, with 1.5″ to 1.55″ thick cedar or other solid woods that naturally retain heat while providing excellent insulation.
Choose weather-resistant woods like cedar, aspen, or thermowood that won’t warp or rot when exposed to moisture and temperature swings.
For insulation, you’ve got great options: fiberglass, mineral wool, foam boards, or rockwool will all help maintain interior warmth. Mineral wool stands out for its excellent soundproofing properties while offering superior fire and moisture resistance.
Don’t forget about proper vapor barriers—foil-backed insulation boards prevent mildew while sealing in heat.
Features like double-paned glass windows and insulated floors minimize heat loss, allowing your sauna to reach ideal temperature in just 30-45 minutes, even in extreme cold.
Power Supply Considerations for High-Capacity Heating Systems
With your sauna structure and materials set for ideal thermal efficiency, proper power supply becomes the next vital factor in guaranteeing your heater performs effectively during frigid winters.
Thermal efficiency is only half the equation—your sauna’s power supply determines if it can conquer winter’s chill.
In extremely cold climates, you’ll need to upgrade your electrical specifications to handle the additional load.
For high-performance winter heating, focus on these power fundamentals:
- Install a dedicated 240V circuit with a 40A-50A breaker for 8-9kW heaters, which provide the robust heating needed when outdoor temperatures plummet below freezing.
- Use heavier 8/2 wiring for runs over 30 feet to prevent voltage drop during extended heating cycles.
- Consider a NEMA 14-50 outlet configuration for 9kW systems that will maintain consistent temperature even when battling sub-zero conditions.
Don’t undersize your electrical system—proper power supply guarantees your sauna reaches temperature quickly and maintains heat steadily. Remember that combining two 120V lines achieves the necessary 240V power required for effective sauna heating in cold conditions.
Frequently Asked Questions
How Long Should I Pre-Heat My Sauna in Sub-Zero Temperatures?
Preheat your traditional sauna for 40-45 minutes in sub-zero temperatures. Infrared models need 15-20 minutes. You’ll want to start earlier than usual and keep doors tightly closed during heating.
Can I Use Solar Power for My Cold-Climate Sauna?
Yes, you can power your cold-climate sauna with solar. You’ll need an oversized array, battery storage, and proper insulation to maintain heat during winter’s limited sunlight hours.
Does Wood Type Affect Heating Efficiency in Extreme Cold?
Yes, wood type greatly affects heating efficiency. You’ll get better performance from denser woods like cedar and hemlock, which retain heat longer than softwoods in extreme cold conditions.
How Often Should Heaters Be Serviced in Harsh Winter Conditions?
You should service your heater at least twice during harsh winters—once before the season starts and again midway through. Increase your routine checks to biweekly during extreme cold.
Will Cold-Climate Saunas Increase My Electricity Bills Significantly?
Yes, your electricity bills will increase, especially with outdoor installations. Traditional saunas add 15-25% more costs in cold climates, but infrared models minimize the impact with their lower energy consumption.
Final Thoughts
You’ve now mastered the fundamentals of cold-climate sauna design. By calculating your space accurately, applying the right power multiplier, and investing in proper insulation, you’ll create an efficient sanctuary that performs even in sub-zero conditions. Remember, your material choices and power supply planning are just as vital as the heater itself. With these principles in place, you’ll enjoy perfect steam sessions all winter long.