
When building a sauna that lasts, start with a solid foundation and efficient framing techniques. Use sturdy materials like 2×4 or 2×6 studs, along with proper insulation to keep the heat in. Don’t forget a quality vapor barrier to prevent moisture issues. Create air gaps with battens for ventilation and use durable cladding materials, like Western Red Cedar, for the walls. With a mix of traditional and modern strategies, you can create a cozy retreat that endures. Want to discover more tips?
Foundations Built to Last
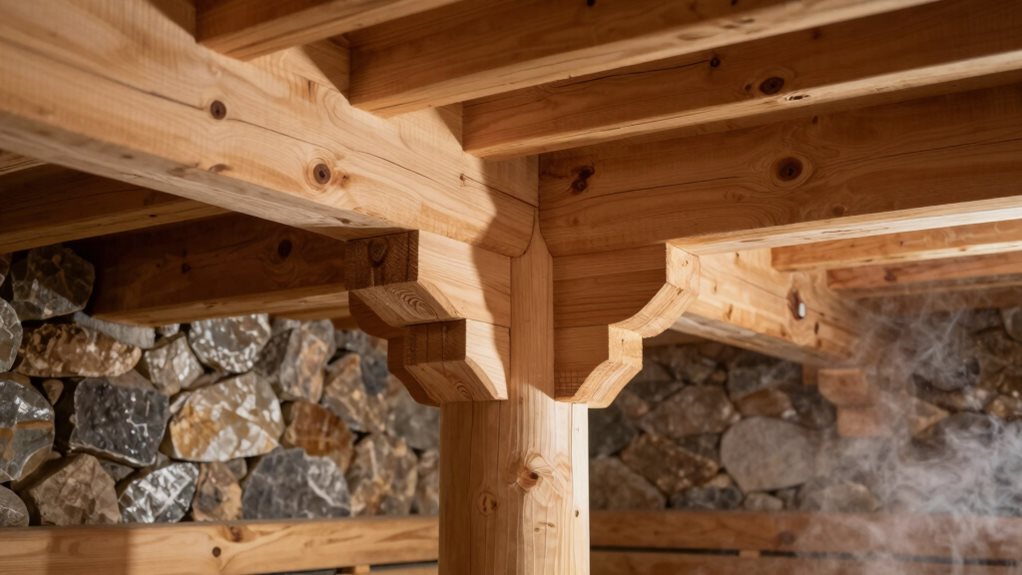
When you’re ready to build a sauna, the first thing you need to do is guarantee your foundation is rock solid. Choosing a level spot with good drainage is key; it prevents water from pooling around your sauna.
Start by clearing away debris, roots, and grass, then dig down at least six inches to remove the topsoil. Compacting the soil guarantees a sturdy base that supports your sauna’s weight.
You might consider adding a gravel base for even better stability and drainage; it’s easy to manage and cost-effective! If you want the ultimate in durability, a concrete slab is the way to go, although it requires more effort and equipment.
Efficient Framing Techniques
Efficient framing techniques are essential for building a sauna that stands up to heat, moisture, and time. Start by using standard 2×4 studs spaced 16 inches on center, as this provides reliable support and simplifies insulation installation.
Efficient framing with 2×4 studs spaced 16 inches on center ensures a durable sauna that withstands heat and moisture.
If your sauna has a longer ceiling span, consider 2×6 studs for added depth, especially when the span exceeds 10 feet. Avoid wider 24-inch spacing to guarantee your panels have solid backing.
Remember to include horizontal blocking at bench ends for added strength, and plan your stud placements carefully for door and window openings.
Don’t forget horizontal strapping over your vapor barrier to create nailers for your interior cladding, keeping everything sturdy and well-ventilated. Additionally, using a sauna insulation kit will enhance the thermal efficiency of your sauna.
Happy building!
Insulation Considerations for Heat Retention
After building your sauna’s sturdy frame, it’s time to focus on the insulation to keep all that warmth where it belongs—inside!
Aim for wall R-values between R-13 and R-19 for typical saunas, but go for R-19 or higher if you’re in a colder area. Remember, heat rises; so make certain your ceiling insulation hits R-26 to R-30. Sauna insulation building materials play a crucial role in achieving these R-values.
When picking insulation, choose materials like mineral wool that can handle heat and moisture without off-gassing harmful chemicals. Additionally, proper insulation enhances efficiency by minimizing heat loss and improving retention. Layering strategies, like using rigid foam with mineral wool, can boost both insulation effectiveness and improve heat retention.
Finally, check your local codes and heater calculations to verify your insulation supports your sauna’s heating needs, keeping those cozy vibes intact!
The Importance of Vapor Barriers
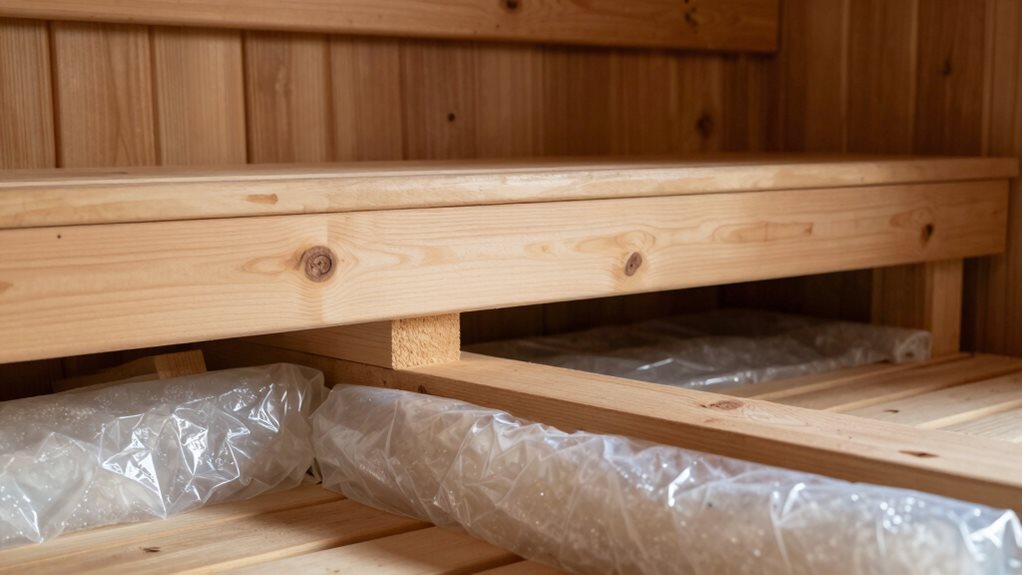
When it comes to building a sauna, understanding the importance of vapor barriers is key. These barriers help control moisture, guaranteeing your insulation performs at its best and extends the life of your sauna. Plus, knowing how to properly install them can make a huge difference in keeping that soothing heat where it belongs—inside your sauna! A well-placed vapor barrier not only prevents moisture from entering wall cavities but also helps in maintaining optimal heat levels. Additionally, they play a crucial role in preserving structural integrity, ensuring that your sauna remains safe and functional over time. Investing in quality sauna moisture protection products can significantly enhance the effectiveness of your vapor barriers.
Moisture Control Strategies
Moisture control in sauna construction is crucial for guaranteeing a long-lasting and enjoyable experience. To keep your sauna cozy and free from mold, you need to use the right vapor barriers. Opt for pure aluminum foil instead of standard plastic, as it withstands heat far better. Pure aluminum foil is essential for traditional sauna construction, as it can effectively block moisture and protect the building structure. This construction technique is particularly important because improper installation can lead to moisture reaching brickwork. Install the foil barrier on the warm side, right behind the wood paneling. Be sure to seal all seams with high-temperature foil tape, since ordinary tape can fail under sauna conditions. Remember to overlap seams by a few inches to create a tight seal.
Insulation Performance Benefits
Vapor barriers play an important role in boosting insulation performance, making your sauna not just comfortable but also efficient.
By placing vapor barriers on the warm side of insulation, you help reduce moisture movement that would lower the R-value through wet insulation. A reflective foil barrier can even add about 1 R-value, bouncing heat back into the room and keeping you cozy without running your heater all the time. Additionally, using a premium sauna insulation kit can significantly enhance the overall effectiveness of your vapor barriers.
Plus, a continuous vapor barrier helps cut down on those annoying air leaks, which can really zap your heat. Proper insulation minimizes heat loss, enhancing energy efficiency and making your sauna even more enjoyable.
And let’s not forget, a good vapor barrier prevents mold and wood rot, guaranteeing your sauna lasts longer and stays safe—no one wants hidden mold to crash their sauna party!
Barrier Installation Techniques
Installing a vapor barrier is a crucial step in creating an effective sauna, and it’s easier than you might think. Start with pure aluminum foil; it stands up to high heat and won’t off-gas like plastics can.
You’ll want to place the barrier on the warm side of the insulation, right behind the wood paneling, with the shiny side facing in. This traps heat and prevents moisture buildup. Additionally, using a sauna moisture control system can further enhance moisture management for your sauna.
Make certain the seams overlap by 2-6 inches and seal them with high-temperature aluminum foil tape. Don’t forget to keep everything dry during installation, as wet surfaces can trap moisture.
Inspect all joints carefully—no gaps should escape your scrutiny! Following these steps will help guarantee a sauna that’s safe, durable, and cozy for years to come.
Creating Air Gaps With Battens
Creating air gaps with battens is an essential step in building a sauna that’s both cozy and durable. These air gaps help manage moisture and minimize mold growth, guaranteeing your sauna lasts longer. Here’s how to do it effectively:
- Choose Your Gap Size: Aim for 1/4 to 1 inch between the vapor barrier and paneling, depending on your materials.
- Install Battens Correctly: Use furring strips or spacers over the vapor barrier, securing them perpendicular to the studs to create channels for airflow. To enhance heat retention, it’s important to incorporate insulation materials within your design.
- Seal It Up: Overlap vapor barrier seams by 6 inches, and make sure to tape them securely to keep moisture out. Properly managing moisture trapping in your sauna walls is crucial for ensuring longevity and performance.
These simple steps help keep your sauna warm, dry, and inviting! Happy building!
Selecting Durable Cladding Materials
When it comes to building a sauna, the choice of cladding materials really sets the stage for comfort and durability. You want wood that not just looks good but also handles heat and humidity well—think Western Red Cedar or thermally modified options. Additionally, using cedar wood sauna heaters can enhance the overall experience by providing efficient and effective heating. Plus, learning about finishing techniques and ventilation can help you create a space that stays cozy and inviting for years to come! Cedar excels in less demanding regions for interior applications.
Best Wood Options
Choosing the right wood for your sauna cladding can make all the difference between a comfortable retreat and a disappointing experience.
You’ll want to select materials that withstand heat and moisture while providing a pleasant atmosphere. Here are three top wood choices:
- Western Red Cedar – Its natural oils resist decay and add a lovely aroma, making it a user favorite.
- Canadian Hemlock – With low resin content, it’s excellent for areas needing reduced sap, keeping benches and walls comfortable.
- Aspen – In addition to staying cool on the skin, its low odor makes it perfect for an inviting sauna experience.
Selecting the right wood means enjoying your sauna without worries about wear and tear! Additionally, using a natural wood sauna heater can enhance the overall experience by maintaining the ideal temperature.
Finishing Techniques Explained
To guarantee your sauna remains a cozy retreat, it’s essential to understand the finishing techniques that will protect and improve your cladding materials.
First, consider using thermally modified wood, known for its amazing durability and resistance to moisture. Western red cedar is another excellent option due to its natural rot resistance, thanks to aromatic oils. Engineered wood sidings are also a smart choice; they handle heat and humidity well.
Applying oil finishes or water-repellent treatments helps slow moisture absorption, keeping your sauna looking great. Don’t forget about stainless-steel fasteners—they prevent rust and staining. Additionally, investing in outdoor sauna accessories weatherproofing can further enhance the longevity of your sauna’s exterior.
Finally, make sure you use proper flashing and vertical rainscreen detailing to promote drainage, which will extend your cladding’s life considerably.
Happy building!
Ventilation Considerations
After you’ve nailed those finishing touches on your sauna, don’t forget about the importance of ventilation.
Good airflow is essential to keep your sauna’s cladding durable and free from moisture problems. Think of it as giving your sauna a chance to breathe!
Here are three key ventilation considerations:
- Balanced Airflow: Make certain your ventilation paths keep pressure balanced, preventing moist indoor air from lingering in the cladding.
- Right Sizing: Follow climate-specific guidance for ventilation openings. Larger openings are needed in humid areas to help moisture escape.
- Quick Drying: Design airflow to allow for rapid drying after steam sessions, ideally exchanging indoor air every few minutes. Including a sauna ventilation system kit can greatly enhance your sauna’s airflow efficiency.
Historical Methods of Sauna Construction
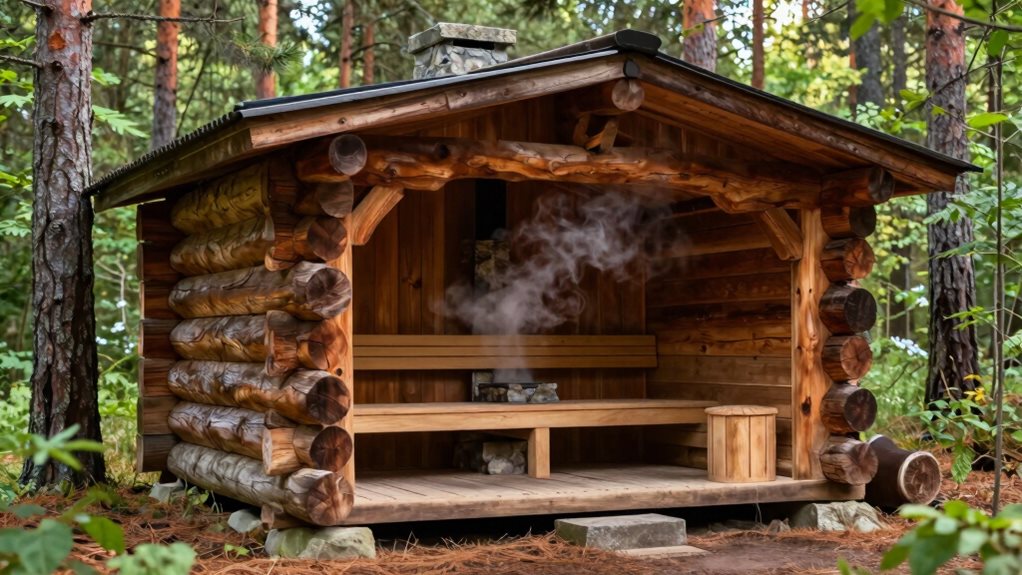
As you explore the fascinating world of sauna construction, you’ll discover that its origins stem from a variety of historical methods that reflect the ingenuity of different cultures.
Early Finnish saunas were often dug into hillsides, using earth and sod for insulation, while Nordic regions utilized caves for excellent heat retention. You might also find the smoke sauna, or savusauna, enthralling; it filled with smoke to create a cozy, radiant warmth.
Meanwhile, American sweat lodges used heated stones for purification rituals. As time passed, log walls became popular in Nordic areas, and stone domes emerged in Korea.
Each design choice demonstrated a clever adaptation to local resources, blending tradition with practical needs for heat and comfort.
Innovative Finishing Touches
When it comes to finishing touches in sauna construction, you’ve got some exciting options to explore!
Durable timber sealing methods can protect your wood from moisture, while a well-planned ventilation system keeps the air fresh and inviting. Additionally, incorporating an effective ventilation system enhances your sauna experience by ensuring optimal air circulation and temperature control. Don’t forget about modern lighting integrations that not just brighten up the space but also create a cozy atmosphere for relaxation.
Durable Timber Sealing Methods
To create a sauna that stands the test of time, you need to focus on durable timber sealing methods that not only protect the wood but also elevate its natural beauty.
Here are three effective methods you should consider:
- Paraffin Oil Application: This light mineral oil treatment works wonders against humidity and heat, creating a deep seal that’s hypoallergenic and safe for indoor use.
- Natural Non-Toxic Sealants: Products like Sauna Seal provide clear, water-cleanup protection against mould and mildew while preserving the wood’s natural appearance.
- Thermally Modified Wood: By removing harmful chemicals and improving stability, this type of wood lasts two to three times longer, guaranteeing your sauna stays solid and beautiful over the years.
Using these methods will give your sauna the durability it deserves!
Ventilation System Considerations
While sealing your sauna’s timber is important for its longevity, proper ventilation is just as crucial for creating a comfortable environment.
You’ll want to place the intake vent near the floor, about 100–300 mm from the heater, for even warmth. Meanwhile, the exhaust vent should sit 600–900 mm up, ideally near the ceiling, to promote effective airflow.
Think of it like a cozy hot air balloon: cool air comes in low, heats up, and rises out high. It’s also smart to make the exhaust a bit larger than the intake to handle the expanding hot air.
Modern Lighting Integrations
Lighting can make or break the atmosphere in your sauna, transforming it from a simple heat room into a serene retreat.
Incorporating modern lighting integrations not just improves the aesthetics but also supports relaxation. Here are three lighting options to ponder:
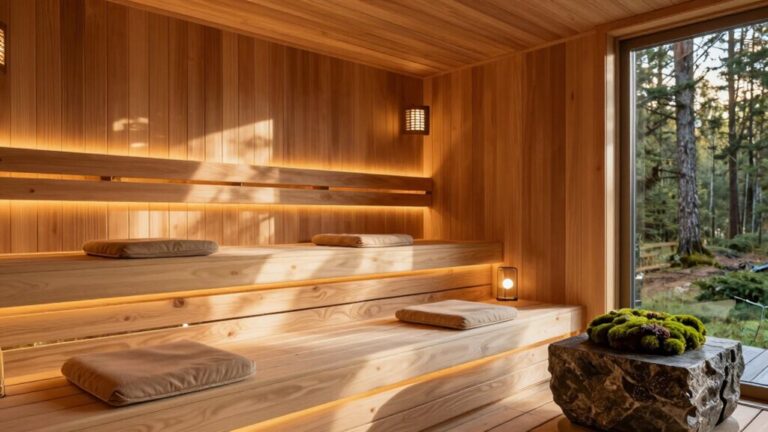
- LED Strip Integration: These versatile strips can be placed under benches or behind backrests, allowing you to adjust brightness and colors for a cozy vibe.
- Fiber Optic Systems: Create a mesmerizing starry ceiling effect with light sources located outside your sauna, guaranteeing safety in humid conditions.
- Recessed Lighting: Blending seamlessly into walls or ceilings, this type offers soft illumination that highlights the beautiful wood grain without being obtrusive.
Choose the right lighting, and your sauna will glow with inviting warmth!
Ventilation Strategies for Optimal Airflow
When building a sauna, proper ventilation is crucial for creating a comfortable and enjoyable experience.
To achieve ideal airflow, place your intake vent low near the heater, about 4–12 inches above the floor, for even heat distribution. The exhaust vent should be higher, ideally 6–12 inches below the ceiling on the opposite wall, promoting excellent cross-room circulation.
Aim for a minimum combustion area of intake at 50–100 cm² and exhaust at 75–150 cm², keeping sizes balanced to prevent pressure buildup.
Whether you choose natural ventilation using convection or mechanical methods with fans, both strategies guarantee fresh air and humidity balance.
Essential Features for Modern Saunas
Crucial features in modern saunas transform a simple heat room into a luxurious retreat.
These elements are designed to improve both comfort and functionality, making your sauna experience enjoyable and efficient.
Here are three fundamental features to reflect on:
- High-Quality Materials: Use softwoods like Western Red Cedar, which resist warping, and opt for tile flooring in entry zones for durability.
- Smart Technology: Incorporate smart controls that allow you to manage temperature and sessions easily, plus safety features that guarantee worry-free use.
- Wellness Improvements: Add elements like chromotherapy lighting and aromatherapy diffusers to create a soothing atmosphere and raise your relaxation experience.
With these features, your sauna can provide a soothing escape that feels both modern and luxurious, assuring moments of bliss and rejuvenation.
Frequently Asked Questions
What Is the Ideal Sauna Size for Home Use?
For home use, an ideal sauna size typically starts at 3′ x 3′ for one person, but 4′ x 6′ suits two to four users comfortably, balancing space efficiency and social interaction. Choose based on your needs.
How Often Should Sauna Wood Be Treated or Sealed?
You should treat or seal sauna wood 1–3 times a year based on usage. Perform routine maintenance after each use, and schedule deep cleaning and inspections annually to preserve wood quality and appearance.
Can I Build a Sauna Without Planning Permission?
Yes, you can build a sauna without planning permission, but make certain it meets permitted development rules. Check local regulations regarding size, location, and use to avoid any legal issues and guarantee compliance.
What Heating Method Is Best for Energy Efficiency?
If you want energy efficiency, infrared heaters are your best bet. They consume less energy, heat your body directly, and have quick heat-up times, making them perfect for regular use without skyrocketing your bills.
How Do I Maintain a Sauna After Construction?
To maintain your sauna after construction, wipe surfaces after each use, ventilate properly, and clean regularly. Inspect monthly for issues, perform deep cleaning periodically, and apply protective oils to keep the wood in good condition.
Final Thoughts
In building a sauna that truly lasts, you’ve got to blend tradition with modern techniques. By focusing on strong foundations, efficient framing, and proper insulation, you create a cozy warm space everyone can enjoy. Don’t forget about vapor barriers and ventilation—these are key to a comfortable atmosphere. As you add in your unique finishing touches, remember that a well-built sauna isn’t just a structure; it’s a haven for relaxation and rejuvenation. So immerse yourself and start constructing your dream sauna!