
For effective glass-heavy sauna insulation, you’ll need tempered double-glazed units (8-10mm thick) with high-temperature silicone seals. Install mineral wool insulation in adjacent walls and create dead air spaces to trap heat. Add a foil-faced radiant barrier to reflect heat back into your sauna, and seal all gaps with high-temperature sealants. Don’t forget proper ventilation with low inlets and high outlets to manage humidity. These strategies will help your glass sauna perform like its traditional wooden counterparts.
The Thermal Challenge of Glass-Heavy Sauna Design
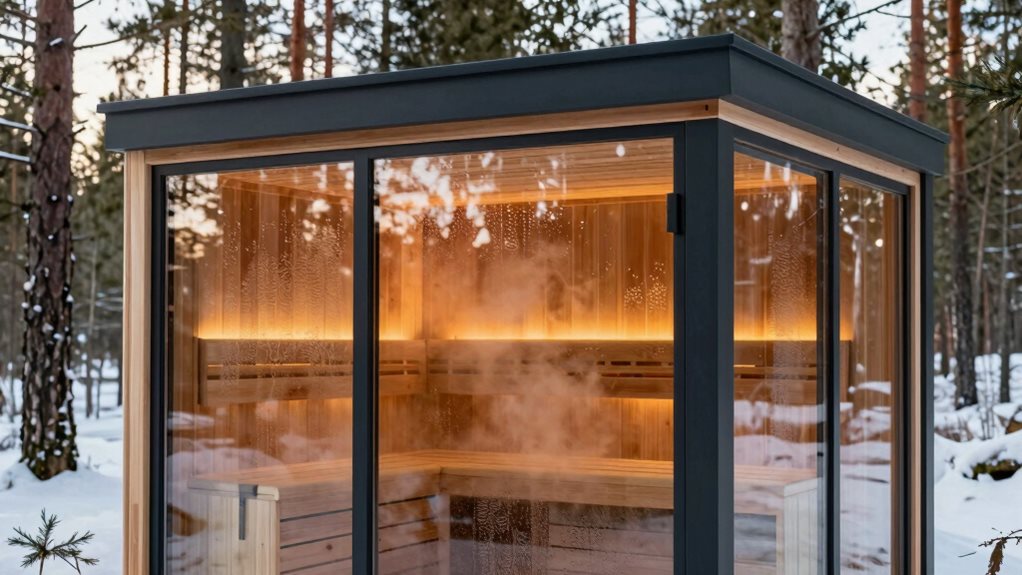
While glass-heavy saunas offer stunning views and a modern aesthetic, they present considerable thermal challenges that can’t be ignored.
Glass fundamentally functions as a polite hole in your insulation system, allowing heat to escape much faster than solid wood walls.
Glass is essentially a well-mannered thermal exit door in your sauna, courteously allowing heat to escape while looking gorgeous.
Think of it this way: your beautiful glass wall is constantly working against your heater. In cold weather, a sauna with full-length glass can take twice as long to heat up compared to traditional designs.
Your heater must work harder and longer to maintain that perfect temperature you’re seeking.
This thermal challenge means you’ll need to adjust your expectations and equipment.
The standard rule of thumb is to install a heater one size larger than what you’d use for a comparable all-wood sauna.
Understanding Heat Transfer in Modern Glass Saunas
The thermal struggle with glass doesn’t stop at slower heating times—it involves complex physics that affects your entire sauna experience.
When you’re sitting in your glass sauna, three heat transfer methods are working simultaneously: radiation, conduction, and convection.
Your infrared emitters radiate heat waves that penetrate deep into your tissues (up to 1.5 inches), creating that enveloping warmth you love.
However, glass walls present a challenge. Without proper insulation, your sauna loses heat through conduction and convection, especially in cold weather.
Single-pane glass can double your heat-up time, while 8mm tempered glass performs better.
For ideal efficiency, consider double-glazed units with argon fill that maintain consistent temperatures within 2-3°F and resist condensation—keeping your sauna comfortably warm even when it’s freezing outside.
Optimal Glass Specifications for Sauna Performance
When selecting glass for your sauna, you’ll need to take into account both insulation value and safety requirements.
Tempered double-glazed units with 8-10mm thickness offer the ideal balance of heat retention, durability, and thermal performance.
Your glass choice will greatly influence how efficiently your sauna maintains temperature, with properly sealed double glazing reducing heat loss by a factor of 0.75 per square meter compared to single panes.
Glass Insulation Values
Ideal glass insulation values serve as the foundation for successful heat retention in any glass-heavy sauna design.
When selecting glass, you’ll want to focus on three key metrics: U-values, R-values, and K-values. Lower U-values and K-values indicate better insulation, while higher R-values mean superior heat retention.
For sauna walls, you’ll need glass that contributes to achieving R-13 to R-15 values, while ceilings should reach R-26 to R-30 to match the overall structure.
Single-pane tempered glass at 8-10mm thickness provides a good baseline for performance, balancing durability with thermal efficiency.
If you’re looking for premium insulation, consider argon-filled insulated glass units (IGUs) with an R-value of 2.8, which can reduce heat loss by 30-40% compared to standard options. Similar to proper wall construction, installing a non-breathable vapor barrier behind any framing elements adjacent to glass panels will prevent moisture from compromising the thermal properties of your sauna. Regularly inspecting the seals around glass panels is essential for long-term efficiency, as even small gaps can significantly impact heat retention and energy consumption.
Tempered Double Glazing
Selecting proper tempered double glazing stands as the foundation of effective sauna glass performance.
You’ll want 1/4-inch insulated tempered glass for your sauna windows, with each pane in dual configurations contributing to a total thickness of 1-5/8 inches including the airspace between them.
For ideal heat retention, consider bronze tinted options, which provide both energy efficiency and privacy while still allowing you to see outward.
Double-glazed units greatly reduce condensation issues, which is vital in the high-moisture sauna environment.
When installing, remember to cut your glass 1/8 to 1/4-inch smaller than your rough opening, and apply silicone beads both inside and outside the frame.
This careful installation guarantees minimal heat loss, making your glass-heavy sauna suitable even for the coldest Canadian and US climates.
Double-Glazing Technologies for Extreme Temperature Differentials
Double-glazing technology stands at the forefront of modern sauna design, especially as glass-heavy constructions become increasingly popular.
When you’re building a sauna with extensive glass, you’ll need insulated glazing units (IGUs) specifically designed for extreme temperature differentials. These units feature two tempered glass panes separated by a sealed cavity, often filled with argon gas rather than air for improved thermal resistance.
You’ll want to guarantee your IGUs use high-temperature silicone edge seals, not standard butyl sealants which can fail prematurely in sauna environments.
Look for stainless or warm-edge polymer spacers that reduce thermal bridging and limit condensation at glass edges.
With proper double glazing, you can reduce heat loss by about 75% compared to single glazing, allowing even full-glass saunas to operate efficiently in cold North American climates.
Strategic Insulation for Walls Adjacent to Glass Elements
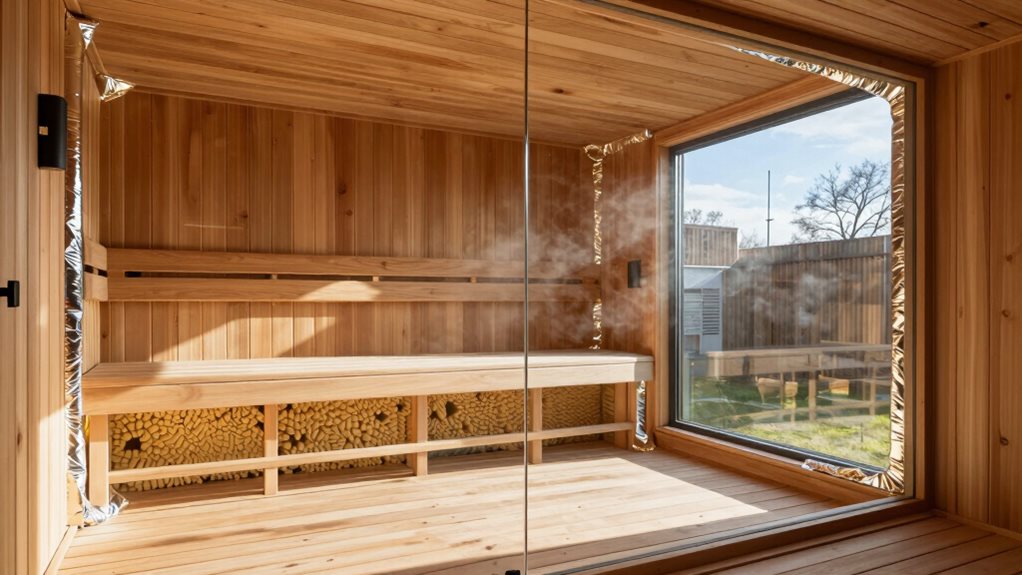
You’ll need to focus on eliminating thermal bridges where your glass elements meet the wall framing.
Creating dead air spaces between framing members helps trap heat and prevents unwanted transfer to the exterior of your sauna.
Since glass walls have poor insulating properties, consider reinforcing surrounding walls with mineral wool insulation to compensate for heat loss through glass sections.
Thermal Bridge Prevention
To effectively combat thermal bridging in glass-heavy saunas, you’ll need to implement strategic insulation where wood meets glass.
Create an air gap between studs and interior paneling, which interrupts heat’s conductive path and allows wall boards to dry properly, preventing mold.
Install foil-faced PIR insulation in walls adjacent to glass elements, sealing all seams with high-temperature aluminum tape. This reflects radiant heat back into your sauna while blocking moisture. Consider installing mineral wool in ceiling areas that meet glass elements as it provides excellent heat resistance and helps maintain consistent temperatures.
Avoid plastic barriers that can’t withstand heat.
Place exterior mineral wool insulation outside your studs, aligning it within 2 inches of the glazing layer for a continuous thermal line. Mineral wool is becoming more widely available and offers superior moisture resistance compared to fiberglass alternatives.
For ceilings near glass roofs, use thicker insulation (R-26 to R-30).
Dead Air Space Optimization
While thermal bridges create heat escape routes, properly designed dead air spaces serve as powerful insulators in glass-heavy saunas.
Contrary to popular belief, true “dead air” insulation comes from air trapped in small cells like fiberglass or rock wool, not from large empty cavities.
When building walls adjacent to glass, you’ll want to fill stud cavities completely with high-temperature-rated insulation. Proper insulation helps retain heat and improve air quality, contributing to a more invigorating sauna experience.
Large hollow spaces actually create convection loops that move heat and moisture, reducing efficiency.
For ideal performance, install a taped radiant-foil vapor barrier on the warm side, then create a narrow ¾–1 inch air gap using furring strips before adding your T&G wood cladding.
This thin, bounded air space improves the foil’s radiant performance while preventing unwanted air movement.
Good ventilation is essential when insulating glass-heavy saunas, as it works alongside insulation to maintain consistent temperatures throughout the space.
Radiant Barrier Implementation in Glass-Heavy Environments
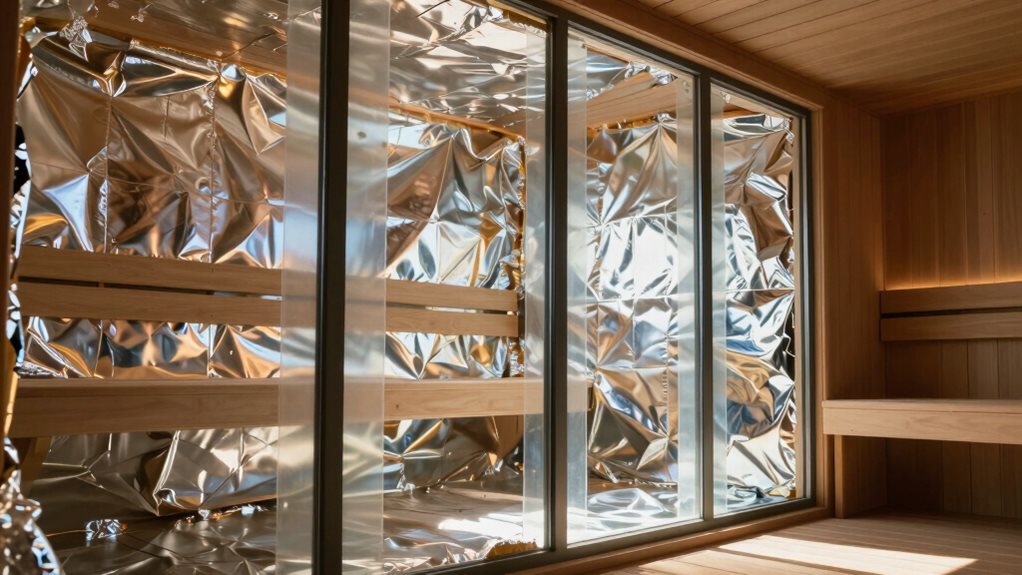
When designing a glass-heavy sauna, proper radiant barrier implementation becomes especially essential for maintaining heat efficiency.
You’ll want to select a high-quality aluminum foil barrier, either paper-backed or woven with fiberglass, to reflect radiant heat back into your sauna room.
Install your barrier by stapling it to studs after framing and insulation, overlapping seams by 2-3 inches. For maximum effectiveness, tape all seams with high-temperature aluminum tape and create a small air gap between the barrier and wood cladding.
This setup adds approximately 1R to your insulation value while preventing heat from escaping through glass areas. Pure aluminum foil available in rolls up to 48 inches wide provides excellent moisture protection at high sauna temperatures. Remember to multiply uninsulated volume by 1.5 when selecting an appropriate heater for glass-heavy saunas.
Don’t use bubble wrap radiant barriers, as they’ll melt in sauna heat. Instead, pair your foil barrier with rockwool insulation for superior performance in your glass-heavy design.
Vapor Management Around Large Glass Installations
Proper vapor management becomes critical in glass-heavy saunas because the extreme temperature differential creates intense vapor pressure. Your sauna’s interior (150-200°F) constantly pushes moisture toward cooler glass surfaces, with most problems occurring at glass-to-wall interfaces, not the glass itself.
Always prioritize your air and vapor sealing on the hot, sauna side. When installing glass, use high-temperature sealants rated for 400-500°F near heaters, and create redundant seals with gaskets, backer rod, and proper trim.
You’ll want to avoid the dreaded “double vapor barrier” scenario – combining low-perm interior foil with low-perm exterior materials traps moisture in your framing.
Remember to incorporate proper ventilation with low inlets and high outlets to keep moist air moving away from glass surfaces, preventing condensation that could damage your sauna over time.
Energy Efficiency Considerations for Glass Saunas
Glass-heavy saunas create a special challenge for energy efficiency since glass typically conducts heat much faster than insulated walls.
When planning your glass sauna, remember that each square meter of uninsulated glass adds about 1.2 cubic meters to your effective sauna volume, requiring a more powerful heater.
You’ll save money by investing in insulated or low-emissivity glass, which can reduce energy use by 20-30% compared to standard glass.
Thicker glass (8-10mm) improves both durability and thermal performance.
Don’t forget to properly insulate the walls and ceiling surrounding your glass panels, as this can make your sauna up to 30% more efficient.
If you’re using an electric heater, proper sizing prevents constant high-power operation, potentially cutting running costs by 25% and extending your heater’s lifespan.
For infrared saunas with glass elements, you’ll still benefit from 75% less electricity compared to traditional saunas while enjoying the panoramic views.
Preventing Condensation on Glass Surfaces
Your glass-heavy sauna will benefit greatly from double-glazed safety glass, which reduces temperature differences and prevents condensation buildup on interior surfaces.
You’ll need to implement strategic ventilation solutions, placing intake vents near the floor and exhaust vents near the ceiling to create airflow that keeps glass surfaces clear.
Installing humidity management systems, such as proper vapor barriers behind the glass and controlled ventilation rates, will maintain the ideal moisture balance that prevents foggy windows during your sauna sessions.
Double-Glazing Essential Benefits
When moisture meets a cold glass surface in your sauna, condensation quickly forms, obscuring your view and potentially damaging wood elements.
Double glazing solves this problem by creating an insulated barrier between interior and exterior temperatures.
Your double-glazed windows will maintain a warmer interior glass surface, typically 30-35°F higher than single panes, preventing warm, moist air from reaching its dew point.
This thermal barrier keeps condensation at bay while reducing heat loss from your sauna. The sealed air or gas gap between panes distributes temperature evenly, eliminating cold spots where moisture typically collects first.
For best results, choose tempered insulated glass units with non-butile silicone seals that withstand high temperatures.
Proper installation with continuous perimeter sealants guarantees your glass stays clear and dry, session after session.
Interior Ventilation Solutions
Proper airflow throughout your sauna creates the ideal environment for preventing condensation on glass surfaces, especially in glass-heavy designs.
You’ll want to direct your ventilation system to distribute warm air along exterior glass panels, keeping them above dew point temperature. This strategic airflow prevents those annoying condensation streaks that can mar your view.
After each sauna session, leave the door open for 30-60 minutes and run your fan to move air over all glass surfaces.
This simple habit dramatically reduces moisture buildup between uses. For best results, combine this ventilation strategy with a quick wipe-down using a microfiber cloth.
Humidity Management Systems
Effective humidity management stands at the heart of any glass-heavy sauna design, requiring thoughtful systems to prevent annoying condensation on your beautiful glass surfaces.
Install a digital hygrometer opposite your heater to monitor moisture levels accurately, guaranteeing you’re maintaining ideal conditions. For seamless control, consider smart systems like UKU panels or EOS EmoStyle H controllers that let you adjust humidity remotely through smartphone apps.
When building, opt for insulated tempered glass cut slightly smaller than your opening and seal thoroughly with silicone inside and out. This thermal layering handles extreme temperature differences that cause condensation.
After each session, wipe down surfaces and leave the door open to promote airflow. You’ll also need proper ventilation to prevent moisture buildup on glass walls, protecting both your view and your sauna’s wooden elements.
Balancing Aesthetics and Thermal Performance
Creating a glass-heavy sauna presents a fascinating design challenge that balances visual appeal with thermal efficiency. When planning your sauna, consider strategic glass placement to maintain both stunning views and comfortable heat retention.
- Limit glass to 10-30% of your total envelope to minimize heat loss while preserving design intent.
- Position glass near the heater to reduce cold-radiation and maximize comfort at bench level.
- Choose insulated glass units (IGUs) with low-E coatings to reflect heat back into the cabin.
- Install double-layer insulation in ceilings to offset lower R-values in glass sections.
- Use thermally broken frames and proper perimeter sealing to eliminate cold bridges.
You’ll need a slightly larger heater for glass-heavy designs, but the reward is worth it—a sauna that offers breathtaking views without sacrificing the authentic heat experience you crave.
Frequently Asked Questions
Can Insulated Glass Units Be Retrofitted Into Existing Sauna Doors?
You can retrofit IGUs into existing sauna doors, but only if your door frame is thick enough to accommodate the 20-24mm depth needed for double glazing and spacers.
How Does Extreme Sauna Heat Affect Glass Seal Longevity?
Your sauna’s extreme heat (75-110°C) greatly shortens standard seal lifespans. Non-sauna seals will soften, deform, and lose elasticity, while heat-humidity cycles hasten aging and create gaps over time.
Are There Special Cleaning Requirements for Insulated Glass in Saunas?
Yes, you’ll need to use non-ammonia cleaners on insulated glass. Wipe daily with microfiber cloths to remove sweat residue and apply a vinegar-water solution weekly to prevent seal damage.
What’s the Maximum Glass-To-Wall Ratio for Maintaining Efficient Temperatures?
You’ll want to keep glass between 15-30% of total wall area for ideal efficiency. Exceeding 30-40% will noticeably increase your heater’s power requirements and operating costs.
Does Tinting or Low-E Coating Impact Heat Retention in Sauna Glass?
Yes, low-E coating greatly improves heat retention in your sauna glass by reflecting infrared energy back inside. Tinting helps too, but won’t match low-E’s thermal performance while maintaining visibility.
Final Thoughts
You’ve now got all the tools to build your glass-heavy sauna without sacrificing heat or efficiency. Remember, proper insulation isn’t just about comfort—it’s crucial for energy savings and longevity. By combining double-glazed panels, strategic wall insulation, and vapor management techniques, you’ll create a sauna that’s both beautiful and functional. The perfect balance between stunning views and steamy performance is absolutely within your reach.