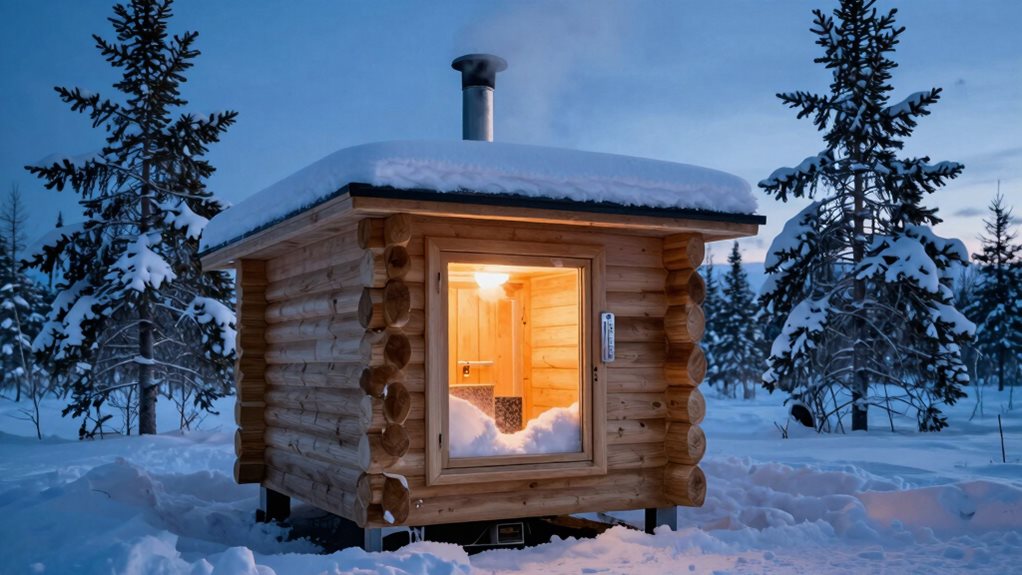

To design a sauna for extreme cold climates, you’ll need specialized construction elements. Use frost-protected shallow foundations with proper insulation and drainage to prevent frost heave. Position the sauna with its narrowest profile facing prevailing winds, with doors on the leeward side. Include high R-value insulation (R19-21 for walls, R30-40 for ceilings) and robust vapor barriers. Choose steep roof pitches for snow shedding and size your heater 25% larger than standard. The right materials and techniques will transform your winter sauna experience.
Foundation Systems to Combat Frost Heave
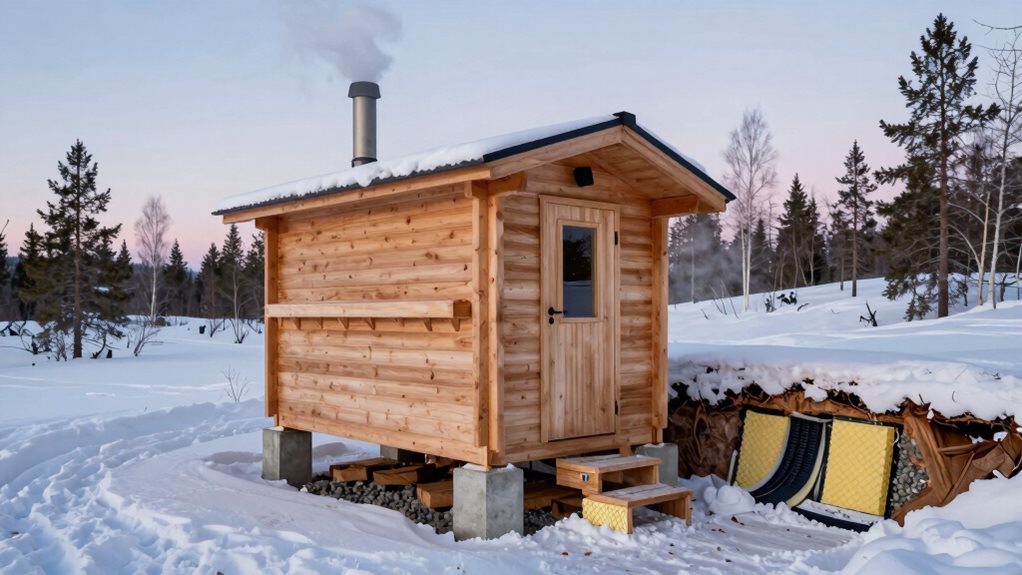
When building a sauna in extremely cold climates, your foundation must withstand the powerful forces of frost heave, which can literally push structures out of the ground.
Frost-protected shallow foundations (FPSF) offer an effective solution that doesn’t require digging below the frost line.
These foundations use strategic insulation—vertical panels around the perimeter and horizontal “wings” extending outward—to trap the earth’s natural heat and prevent freezing underneath your structure.
You’ll need extruded styrofoam insulation (1-2 inches thick) placed under the slab and extending 3-4 feet around the edges.
For smaller saunas, consider alternatives like concrete piers, floating slabs on compacted gravel, or post construction.
Whatever system you choose, proper drainage is vital—incorporate compacted gravel bases and French drains to direct water away from your foundation.
Strategic Building Orientation for Wind Protection
When building your sauna in extreme cold climates, proper orientation can greatly reduce wind exposure and improve energy efficiency.
You’ll want to position your sauna with its narrowest profile facing prevailing winds, while utilizing natural windbreaks like trees or existing structures to create a protective microclimate.
Orient your entry door on the leeward side (away from prevailing winds) to prevent cold air from rushing in during use and to make coming and going more comfortable during harsh weather conditions. Consider seasonal wind patterns when determining final placement to ensure your sauna remains accessible and comfortable year-round. A well-protected sauna will maintain heat retention more effectively, improving both comfort and operational efficiency in freezing temperatures.
Windward vs. Leeward Placement
Strategic placement of your sauna relative to prevailing winds can dramatically affect its efficiency and comfort in extreme cold climates. Understanding windward and leeward positioning is vital for your design.
Your windward side faces into the wind, creating positive pressure that can increase cold air infiltration and accelerate heat loss by up to 30%. It’s ideal for fresh air intakes but problematic for doors and entrances. The wind-driven ventilation creates natural airflow patterns that must be strategically managed in extreme cold conditions.
The leeward side, sheltered from direct wind, experiences negative pressure that naturally draws stale air out. Position your sauna doors, benches, and relaxation areas on this protected side to reduce wind chill and improve user comfort after bathing.
This orientation can reduce heating needs by 15-25% during harsh winters and keep your sauna usable even when winds exceed 40 mph.
Natural Windbreak Integration
Natural windbreaks offer powerful protection for your sauna against harsh winter conditions, often meaning the difference between a comfortable experience and an inefficient, drafty structure.
By strategically positioning your sauna behind vegetation, landforms, or built elements, you’ll dramatically reduce wind exposure.
Dense, staggered rows of evergreen trees can cut wind speeds by up to 75% when placed 2-5 times their mature height from your sauna.
For immediate protection, consider building low stone walls or wood fences with about 50% porosity upwind of your structure—this breaks wind energy without creating turbulent eddies.
Don’t overlook natural terrain advantages!
Placing your sauna in a gentle depression or on the leeward side of a ridge creates a sheltered microclimate.
Just guarantee proper drainage to prevent cold-air pooling during calm nights.
Entry Door Positioning
Properly positioning your sauna’s entry door stands as one of the most critical decisions you’ll make when building for extreme cold climates.
Place your door on the leeward side of your sauna, opposite from prevailing winter winds, to minimize heat loss and cold air infiltration. You’ll want to check local wind rose data to understand which direction brings the harshest gusts in your area.
Consider creating a recessed entryway or small vestibule that shields the door from direct wind pressure. This buffer zone acts like a thermal airlock, trapping cold air before it reaches your main sauna space.
When designing this shift area, guarantee both exterior and interior doors open away from prevailing winds, and include practical features like floor drainage for melting snow and adequate space for removing outdoor gear.
Arctic Entry Design Principles
When designing saunas for extreme cold environments, the entry system serves as the critical interface between the frigid exterior and the warm sanctuary within. A well-designed arctic entry prevents massive heat loss and maintains the sauna’s thermal comfort.
You’ll need a separate vestibule or airlock between the exterior door and sauna room, with a recommended depth of 1.0-1.5 meters for harsh climates.
- Install insulated exterior doors with tight perimeter seals that can withstand repeated wet/dry cycles and prevent wind-driven cold air infiltration.
- Position the entry to support the sauna’s natural convection loop – keeping cold drafts away from the bench areas where people sit.
- Create a transitional area with lower “cold” bench areas for acclimation before users move to higher “hot” benches.
Vapor Control Strategies for Subfreezing Conditions
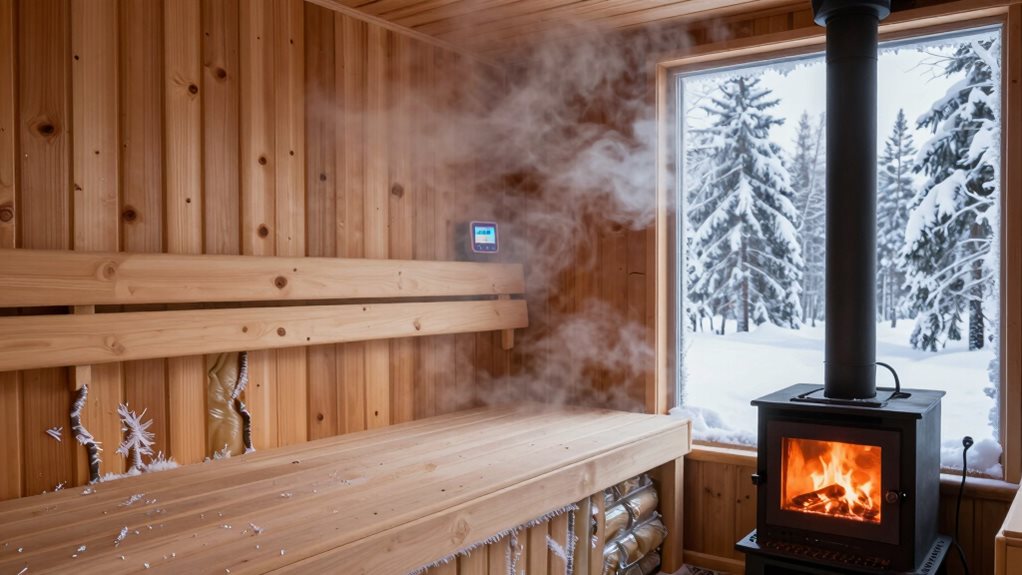
When building a sauna for extreme cold environments, you’ll need a continuous interior vapor barrier to prevent moisture migration that can rot walls and reduce insulation efficiency.
Your vapor barrier installation should include condensation point analysis to guarantee the barrier surface stays above dew point, requiring at least 6 inches of insulation in subfreezing conditions.
For maximum protection in the harshest climates, consider the double-barrier technique, which adds a secondary moisture control layer and creates a thermal break that greatly improves your sauna’s longevity and performance. Non-perforated foil serves as an ideal vapor barrier option that effectively protects against moisture damage in subzero temperatures.
Continuous Interior Vapor Barriers
Designing an effective vapor barrier system becomes critically important in subfreezing conditions where the temperature differential between your sauna’s interior and the external environment creates perfect conditions for condensation problems.
When installing your sauna in extremely cold climates, aluminum foil provides the most reliable continuous interior vapor barrier, outperforming plastic options that deteriorate above 200°F.
For ideal vapor control in subfreezing environments:
- Install uninterrupted aluminum foil vapor barrier (48 inches wide) on all interior surfaces, including walls, ceiling, and floor.
- Overlap seams by 2-3 inches and seal thoroughly with high-temperature aluminum tape.
- Create an air gap between the foil barrier and interior paneling using furring strips, which improves the barrier’s heat-reflecting properties.
This complete sealing strategy prevents moisture migration into cold wall cavities where it could freeze, causing structural damage over time. The aluminum foil also offers 1R insulation efficiency when properly installed with the reflective side facing the sauna interior. Proper construction with sealed seams is essential to maintain a moisture-free environment even in the most extreme temperature differentials.
Condensation Point Analysis
Understanding the condensation point in your sauna becomes crucial when temperatures outside plummet below freezing. At high temperatures like 160°F with 40% humidity, the dew point reaches a staggering 125°F, causing vapor to condense directly on your skin. This creates that intense heat pulse you feel during a session.
You’ll need to strategically position your vents to manage this moisture. Place low intake vents on one wall with high exhaust vents on the opposite side to create effective airflow. For best results, install two intake points (near the heater and under the door) and two exhaust points (at head height and under benches).
After using your sauna, prevent moisture damage by implementing a drying cycle. Using bath fans coupled with residual heat helps eliminate dampness that could otherwise lead to rot within five years.
Double-Barrier Technique
The double-barrier technique in sauna construction presents a considerable challenge when building for extreme cold.
While typically avoided because moisture needs to dry in at least one direction, there are specific approaches you’ll need for subfreezing conditions.
The key is balancing vapor control with proper insulation to prevent condensation and structural damage. Continuous vapor barriers are essential as they provide complete protection against moisture penetration into the wall structure.
For successful vapor control in extreme cold:
- Install a single aluminum foil vapor barrier on the warm side (interior), paired with vapor-permeable materials on the exterior.
- Add at least 6 inches (R-21) of insulation behind the vapor barrier to keep surfaces above dew point.
- Maintain a ¼-inch air gap between the vapor barrier and interior paneling for proper ventilation.
- Outdoor saunas in frigid environments may require thicker mineral wool to ensure optimal thermal performance and energy efficiency.
Insulation Specifications for Extreme Temperature Differentials
When building saunas for extreme cold environments, proper insulation becomes your most critical defense against the dramatic temperature differentials between the steamy interior and frigid exterior conditions.
You’ll want to target R19-R21 for your exterior walls, using a double-wall construction that creates continuous insulation with an air gap for condensation control.
For ceilings, aim higher with R30-R40 values since heat rises and escapes there first. Polyiso insulation delivers about R-6 per inch, making it efficient for tight spaces.
Don’t forget your floor—R10-R20 insulation prevents heat loss to frozen ground.
Always install vapor barriers on the warm side of walls, and ascertain all materials can withstand sauna temperatures.
Poorly sealed doors can waste 15-20% more energy, so invest in quality doors with insulated cores.
Heater Sizing and Cold Climate Performance Requirements
When you’re building a sauna in extreme cold climates, you’ll need to calculate heat output requirements carefully, typically adding 25% more power than standard sizing charts suggest.
Your choice between electric, wood, or gas heaters will impact reliability during power outages and temperature recovery times, with wood heaters offering independence from utility disruptions.
You’ll find that implementing smart preheat strategies, such as scheduling warm-up times or using remote activation, becomes crucial when ambient temperatures drop below freezing, preventing uncomfortable waiting periods in frigid conditions. Proper insulation quality is particularly critical in extreme cold environments, as it directly affects the heater’s ability to maintain consistent temperatures and energy efficiency. For outdoor installations in extreme cold, you’ll need significantly more power compared to indoor saunas due to greater heat loss through walls and roof surfaces.
Critical Heat Output Calculations
Properly sizing a sauna heater for extreme cold climates demands careful calculations that go beyond standard recommendations. When outdoor temperatures plummet, your heater must work harder to maintain those perfect sauna conditions.
Start with the basic volume calculation (Length × Width × Height), then apply the appropriate power factor—typically 1 kW per 35-50 cubic feet of space.
For extreme cold environments, follow these critical adjustments:
- Add 10-25% extra capacity for outdoor installations or poorly insulated structures.
- Include approximately 1 kW for every 5 square feet of glass or uninsulated surface.
- Round up to the next available heater size when in doubt, especially if you’ll be using the sauna in temperatures below -20°F.
These adjustments guarantee your sauna reaches ideal temperatures within 30-60 minutes, even when facing arctic conditions.
Fuel Selection for Reliability
Choosing the right fuel source stands as one of the most critical decisions you’ll make when designing a sauna for extreme cold climates. Each option offers distinct advantages in harsh conditions.
Wood-fired heaters continue operating during power outages but require dry, seasoned fuel and proper chimney design to maintain efficiency.
You’ll need accessible storage and regular tending during use.
Electric heaters provide consistent, controllable heat but remain vulnerable to grid failures.
For extreme cold, increase your heater capacity by 10-25% beyond standard sizing and consider backup power options.
Gas heaters work during outages if they’ve battery or standing pilot ignition.
In frigid temperatures, you’ll need cold-rated regulators and possibly tank insulation to prevent propane from losing pressure.
For maximum reliability, consider a hybrid approach with primary and backup heating methods.
Preheat Strategies Matter
In the punishing environment of extreme cold, your sauna’s heater size determines whether you’ll enjoy a proper steam bath or sit shivering in a lukewarm box.
When temperatures plummet, standard heater calculations simply won’t cut it. You’ll need to increase your heater capacity by 15-25% depending on your location’s severity.
For reliable performance in extreme conditions:
- Calculate your base heater size (1 kW per 35-50 cubic feet), then add 25% for regions like Alaska or Finland.
- Factor in additional power needs for glass features (10-15% more) or poor insulation.
- Consider longer preheat times – a properly sized heater might take longer to warm up but will maintain steady temperatures.
Material Selection for Freeze-Thaw Durability
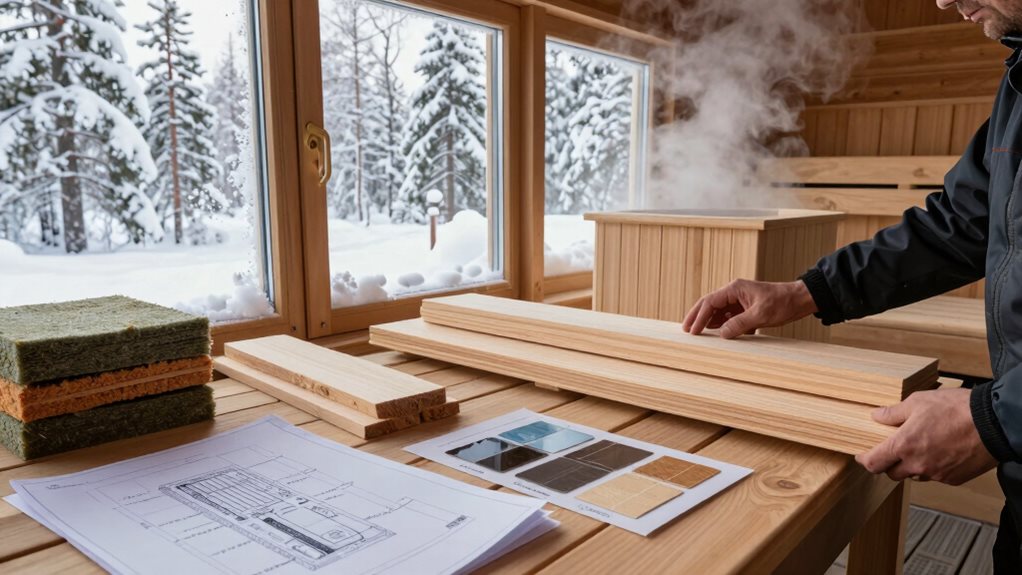
Material selection stands as the cornerstone of sauna durability in extreme cold climates where freeze-thaw cycles can quickly deteriorate poorly chosen components.
Sauna longevity begins with materials that can withstand winter’s relentless freeze-thaw assault on vulnerable components.
You’ll want to prioritize thermally modified woods like Thermowood, which dramatically reduce moisture uptake and improve dimensional stability compared to untreated options.
While Western Red Cedar and Norway Spruce have proven track records in cold climates, heat-treated spruce often outperforms untreated cedar by resisting warping and requiring less maintenance.
For exterior elements, choose breathable, penetrating finishes rather than film-forming ones that trap moisture.
Don’t forget to pair your wood selections with proper hardware—always use stainless steel or hot-dip galvanized fasteners to prevent corrosion as materials expand and contract during temperature swings.
Ventilation Solutions for Safe Winter Operation
Proper ventilation becomes absolutely critical when operating saunas in extreme cold environments, where the stark temperature differential can create unique challenges for air circulation.
In winter, you’ll want to adapt your ventilation strategy to maintain comfort while preventing moisture buildup and guaranteeing efficient heating.
For ideal winter sauna ventilation:
- Vent to indoor air rather than directly outside when possible, reducing cold drafts and allowing faster heat-up times.
- Implement the “Bake & Breathe” method by closing doors overnight after use, then opening in the morning to properly dry the space.
- Position your lower intake vent about 4 inches from the floor near your heater, while keeping a 1-2 inch gap under the door to improve natural gravity flow.
Snow Load Management and Roof Design
When building a sauna in extreme cold environments, your roof design becomes absolutely critical for managing heavy snow loads that can accumulate during winter months.
Choose steep roof pitches (30° or greater) to encourage snow shedding, unlike shallow slopes where snow tends to pile up dangerously.
Your roof’s geometry matters too—gable, hip, or steeply pitched designs prevent snow cornices from forming.
Don’t forget properly sized overhangs (12-24 inches) to protect walls while directing shed snow away from entrances.
For structural integrity, verify your roof framing meets local snow load requirements, typically with rafters spaced 16-24 inches apart.
Consider adding snow guards to prevent dangerous sudden slides, and incorporate effective insulation with proper ventilation to prevent destructive ice dams that form when heat escapes unevenly.
Energy Efficiency Tactics for High-Performance Winter Saunas
Creating an energy-efficient sauna for extreme cold climates requires thoughtful design strategies that preserve heat while optimizing comfort and functionality. Your insulation choices make a tremendous difference, as proper thermal barriers prevent precious heat from escaping when temperatures plummet outside.
- Insulate thoroughly – Use high-performance materials like mineral wool or closed-cell spray foam to achieve R-21+ in walls and R-30+ in ceilings, and don’t forget to insulate the floor to prevent ground heat losses.
- Select appropriate heaters – Size electric heaters correctly for your sauna’s volume, or consider infrared panels that can reduce energy use by 40-60%.
- Control airflow intelligently – Design ventilation with heat recovery in mind, using controllable vents that remain closed during heat-up and positioning inlets low near the stove with outlets high for efficient circulation.
Frequently Asked Questions
How Quickly Will Pipes Freeze if the Sauna Isn’t Regularly Used?
Your pipes will freeze within 6 hours at 20°F if uninsulated and exterior-facing. Even at 32°F, they’ll freeze after about 12 hours without proper protection or water circulation.
Can Solar Power Systems Effectively Operate a Sauna in Arctic Conditions?
Yes, solar systems can power your Arctic sauna with proper design. You’ll need curved gold-plated panels, snow-shedding mounts, battery storage, and insulation for components to guarantee reliable operation.
Are Glass Walls Practical in -40°F Temperatures?
Glass walls aren’t practical at -40°F without considerable mitigation. You’ll need triple-glazing, thermally broken frames, and oversized heaters to combat extreme heat loss and prevent condensation and frost formation.
How Does Extreme Cold Affect Wood Treatment and Maintenance Schedules?
You’ll need to increase treatment frequency as extreme cold accelerates moisture damage. Thaw wood completely before treating, and apply water-repellent sealants rather than paint for better protection.
What Wildlife-Proofing Measures Are Necessary for Remote Cold-Climate Saunas?
Install steel mesh barriers beneath floors, use bear-resistant hardware, maintain regular inspections, and keep food scents away. You’ll need metal flashing around foundations and wildlife-resistant trash storage nearby.
Final Thoughts
You’ve now got the knowledge to build a sauna that thrives in extreme cold! By focusing on frost-resistant foundations, strategic orientation, proper vapor control, and specialized insulation, you’ll create a warm haven even when temperatures plummet. Don’t forget durability in materials, safe ventilation, and strong roof design. With these techniques, your winter sauna will be efficient, comfortable, and ready to provide steamy relaxation through the harshest conditions.